Storyboarding apps
Recently, I finished up and released my app EveryBible on the OpenStore[1]. I have a specific way of building apps, and when I'm done, I have a sort of "mini review" process I run on myself to see if the outcome of building the app lines up with what I set out to do. While doing that review with my app EveryBible, I realized I tend to do it the same-ish way every time, so I decided to document that process for my future self, or for others that might find it interesting.
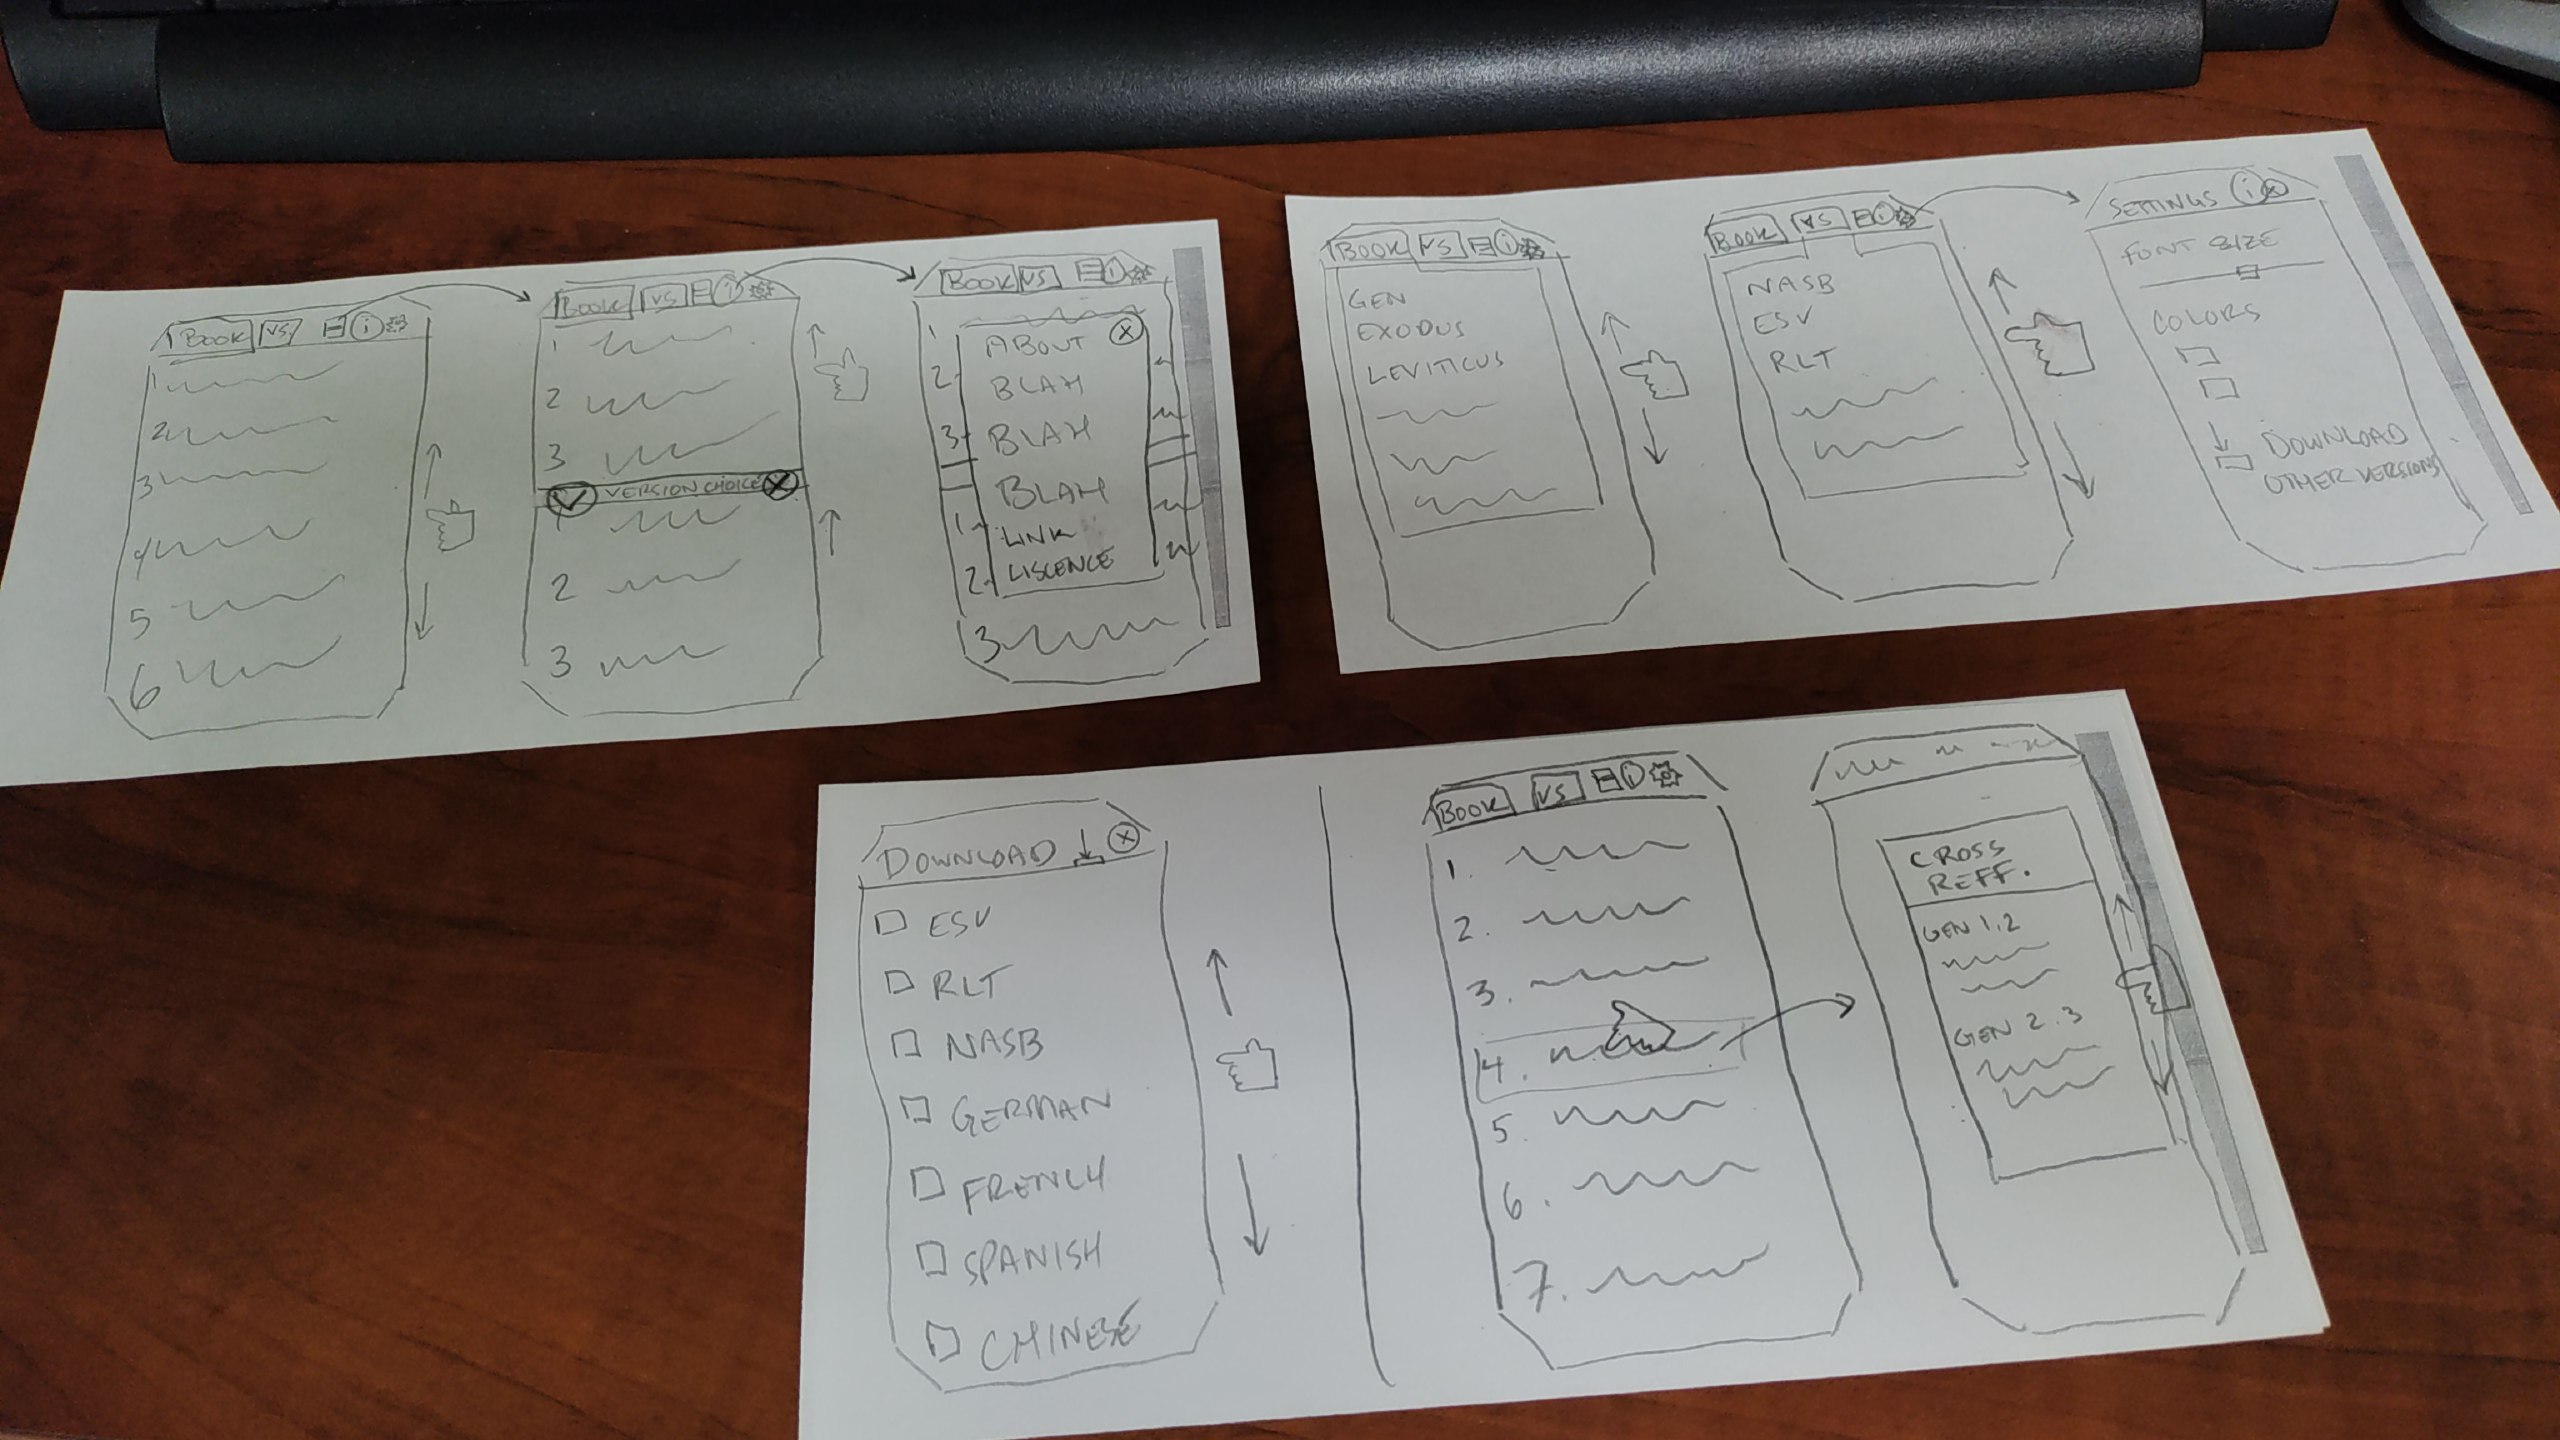
If you can see the photo above, you'll note that it looks a lot like the finished product of EveryBible[2]. That's because it is the original storyboard I made for the app when I set out to build it. While the date is not shown here, the photo was taken in January of 2026, which is about seven months before I released EveryBible on the OpenStore.
I realize that my methods may not be the best, nor will they work for everyone, but this seems to be the process that works best for me: storyboarding. Maybe because I'm old school, or maybe because I'm behind the times, I like to draw, by hand, what I want my program to look like. Or, if it is not a program with a graphical interface, then to storyboard the key elements of it's function. I find this helpful because, if you don't know where you are gong, you'll never know when you get there.
I also find this extremely helpful for the GUI (graphical user interface), when you know what you want it to look like, and how you want it to act. You'll note in my drawing, I drew a little hand with a pointer finger swiping, scrolling, moving, etc., and then drew arrows of where that would go to next. Even the font size slider bar is present in this drawing, just as it is in the finished product.
Granted, there were a few changes along the way, but the overall idea is all there in the drawing, before I wrote a single line of code for the app. You might see that in the settings, I originally intended for the user to be able to pick the colors of the text and background, which did not make it into the final product because I decided instead to follow the system theme, so if the user switches to dark mode, the app will switch, and to light mode, the app again will switch. This change made the app more congruent with the rest of Ubuntu Touch, which was something I realized was important later in the design process.
So for me, my process looks like this:
Storyboard the app.
Research which tech to base the app on.
Start coding.
Revisit the storyboard and revise the code as needed.
Review the finished product to see if it met my goals/expectations from the storyboard.
I don't know if this is helpful to anyone else, but it is really helpful to me, because I can keep looking back at the storyboard as I design each element and I know what I want it to look like and if I've acheived my main goals or not.
Linux - keep it simple.
[1] https://next.open-store.io/app/everybible.alaskalinuxuser/ [2]https://gitlab.com/alaskalinuxuser/everybible
EveryBible hits the OpenStore
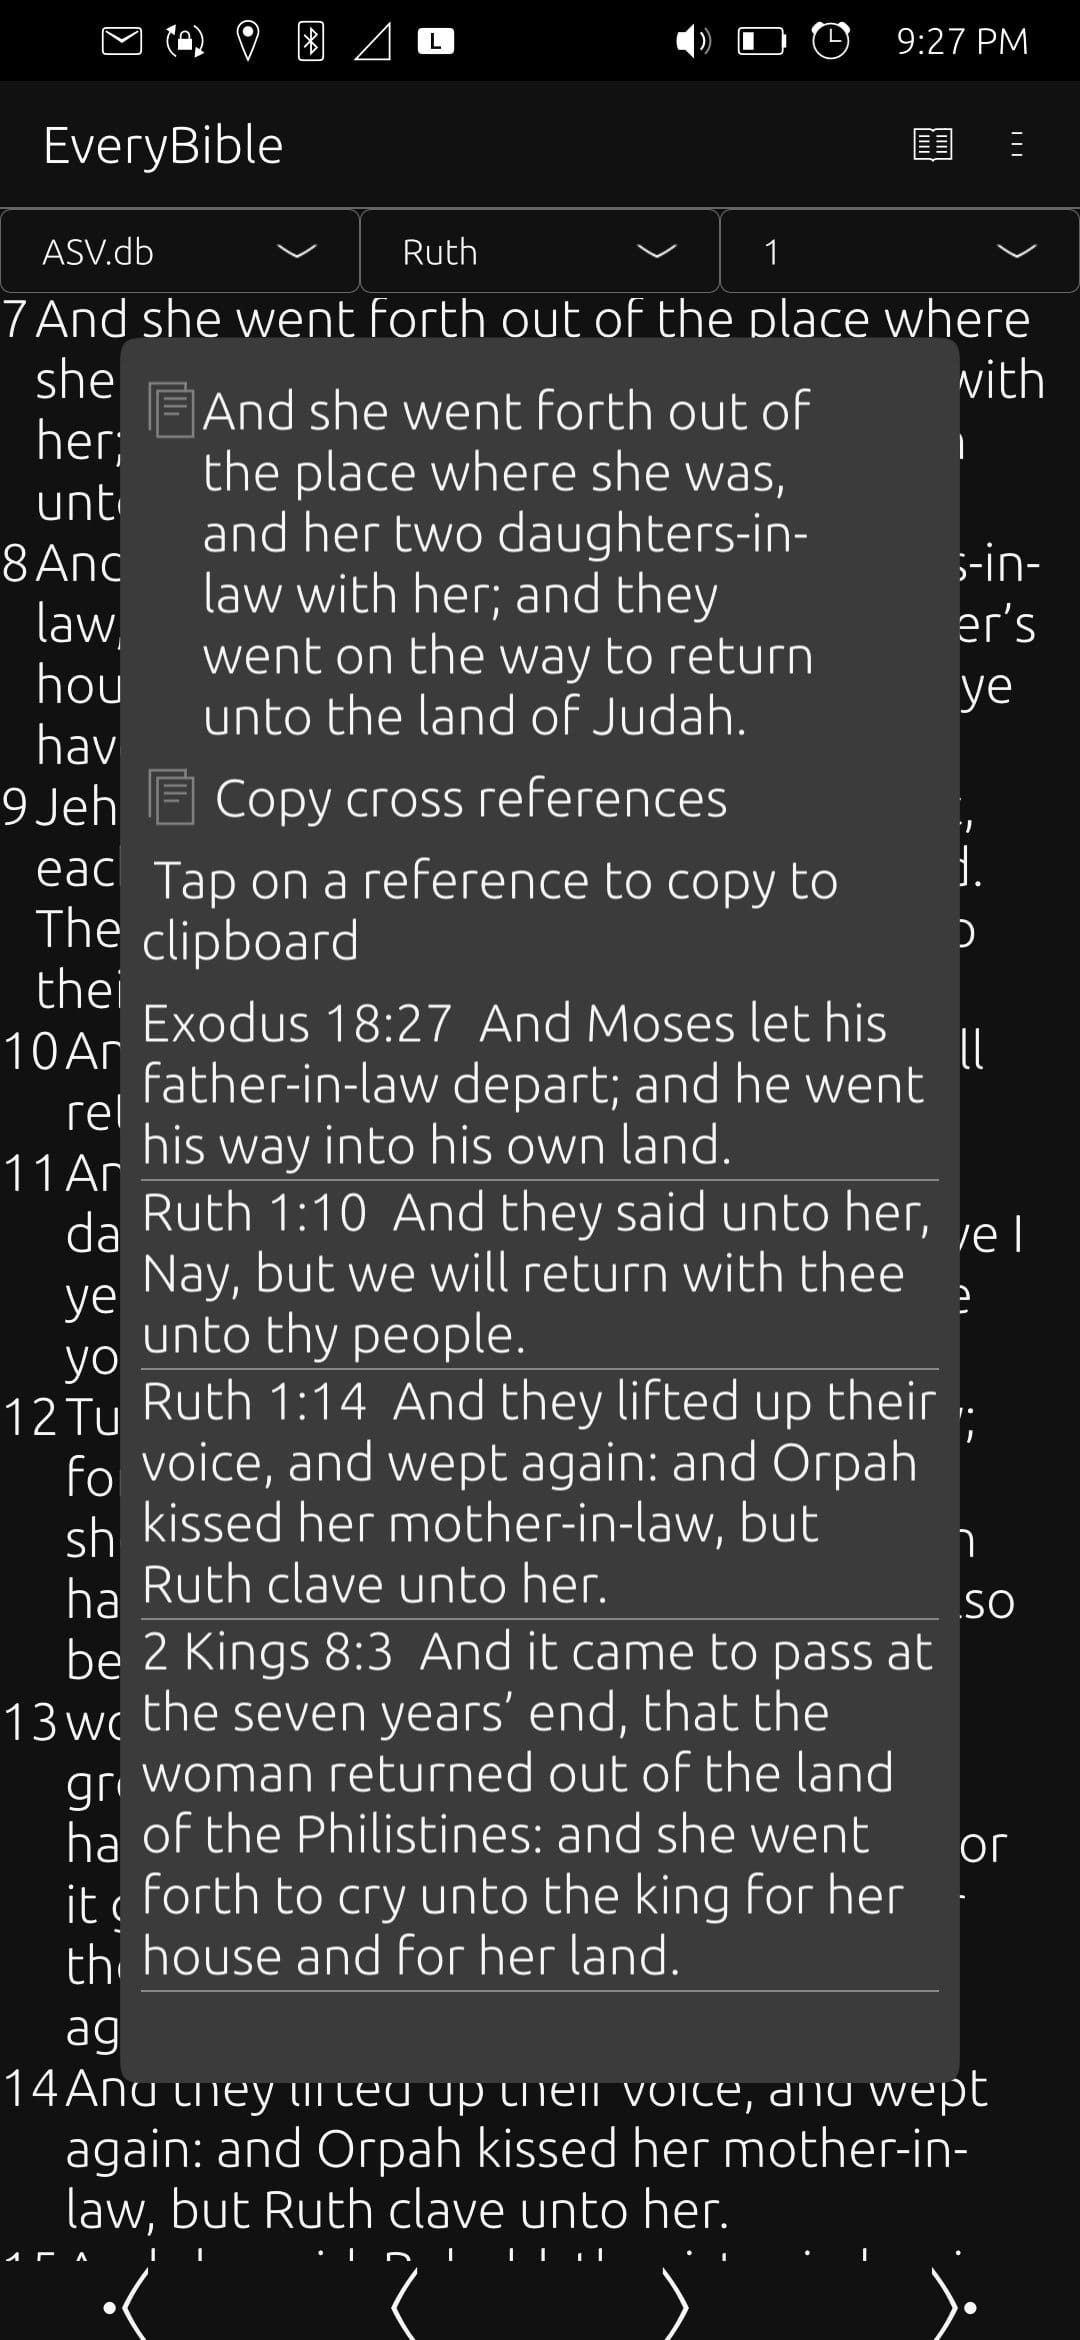
After much work, I have finally released EveryBible on the OpenStore! [1]
While far from perfect, I feel that the app is ready for general use. Some of the main features so far are:
Over 100 Bible translations
Over 340000 cross references
Dark/light mode which follows the system theme
Display one or two Bibles at a time
Ability to adjust font and margin sizes
Copy verses or references to the clipboard
I hope that it will be a blessing to others, hopefully not as a paper Bible replacement, but as a tool to help people traveling, or looking up verses, or reading more often. I feel it could be a handy way to quickly find a verse and share it with a friend by copying it and sending in a text message. Or perhaps for someone like myself, who finds they have some free time while waiting somewhere for something else, and want to read a few chapters of the Bible. Maybe even a handy tool to share the Bible with others, as it does support Bible versions of many languages.
This program only ships with the Bible in Basic English (BBE) which is in the Public Domain, though other versions can be quickly downloaded from the downloads page. Other Bible versions are made available by the Scrollmapper project (MIT), with an already downloaded and integrated cross reference database from the OpenBible project (CC-BY 4.0) making cross referencing and verse loading quick and available offline. You can tap on verses to bring up cross references, and use the navigation bar or drop downs to switch between chapters.
I did not use AI to write this app. However, due to my lack of skill and often looking up functions by example in other's work, it may look like "sloppy" programming. Feel free to check out the code at my repository [2]. I'm sure now that people are starting to use it, there will be a few bug reports to review, and I would really like to implement a feature that LibreHacker suggested, which is a way to take personal notes while studying.
Linux - keep it simple.
[1] https://next.open-store.io/app/everybible.alaskalinuxuser/ [2]https://gitlab.com/alaskalinuxuser/everybible
Copy and Cross References in EveryBible
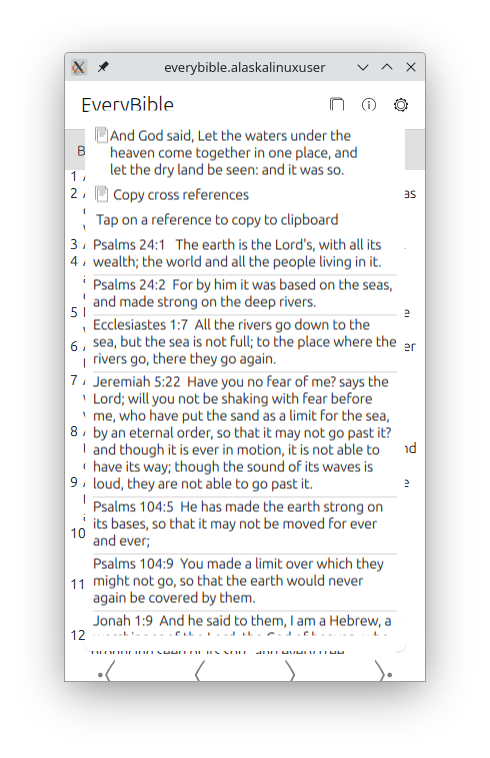
Another milestone was reached today on my work with EveryBible [2], a Bible application for Ubuntu Touch that features 140 different translations. Today I have wrapped up the commits for displaying cross references!
The way it works is after selecting your version, book, and chapter, your verses are displayed. You can scroll through them, go back or forward a chapter, etc., but when you click on a verse, a popup will display allowing you to copy the verse, or copy the list of verse cross references, and it will display each cross referenced verse in a scrollable list. On that list, you can click on a verse to copy that to your clipboard as well!
The code for copying to the clipboard was rather interesting, and it goes like this:
onClicked: {
var mimeData = Clipboard.newData();
mimeData.text = "" + crossReferences;
Clipboard.push(mimeData);
}
Where you have to make a new data variable for the clipboard and then push things to it. There was a simpler, more direct method in the api-docs [1], but it didn't work that way for me, so I had to use this more in depth method. Most likely it is just a failure on my part to understand how it should work, but this certainly gets the job done!
When I was building the cross reference popup, I was trying to consider the end user use cases. In the end, I came to the (hopefully not flawed) conclusion that the average user of the EveryBible app does their deep, deep theological and Biblical studies elsewhere, and that this was more or less a reader tool for daily reading while being on a bus or train, or sitting at home in an easy chair. My other thought was that the user, being on a phone, might just be referencing something quickly, and then they want to text a verse or cross reference to a friend.
Only time and user review comments will tell if that is the way this is used or not, but I hope that it will be helpful to those "on the go". Feel free to check out the latest commits at the repo[3]!
Linux - keep it simple.
[1] https://ubports.gitlab.io/docs/api-docs/index.html?p=lomiriuserinterfacetoolkit%2Fqml-lomiri-components-clipboard.html [2] https://alaskalinuxuser3.ddns.net/Making%20EveryBible%20for%20Ubuntu%20Touch.html [3]https://gitlab.com/alaskalinuxuser/everybible
Making EveryBible for Ubuntu Touch
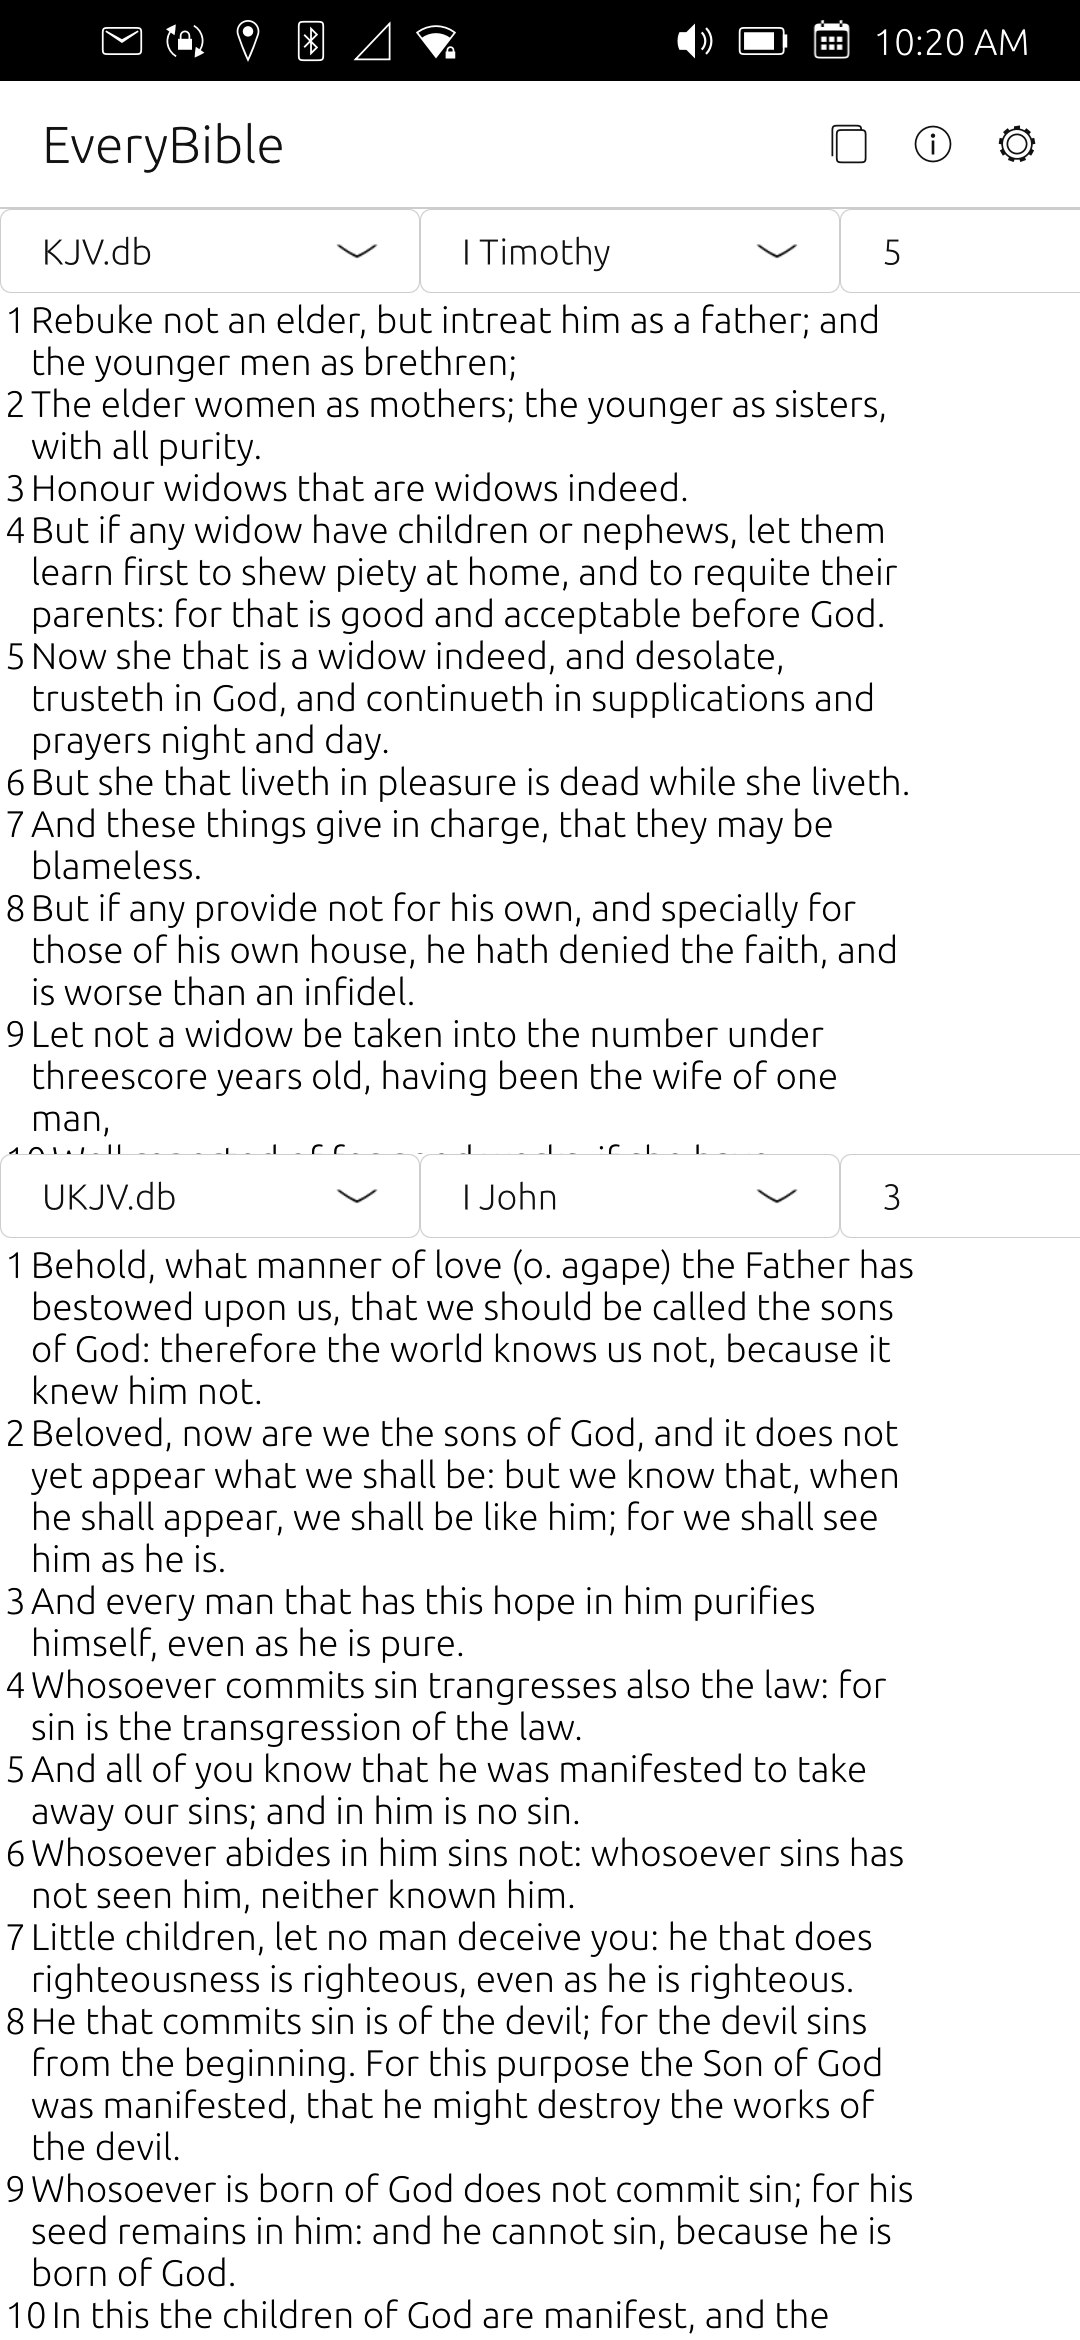
A really big project (for me) that I've been working on recently is a new Ubuntu Touch app that I'm calling "EveryBible". An app that allows you to read numerous Bible translations with linked in cross references. When I first started using Ubuntu Touch after a many years hiatus, I was surprised to find that there were no apps to read your Bible on UT. During my work of updating older apps for Ubuntu Touch, I was able to update an older app which allowed you to read the Jubilee Bible, but that was it. There was, of course, the great Bible app that I have been working on for years called "The Book Wurm", in partnership with Mr. Wurm, but it isn't so much a Bible reading app as it is a KJV Bible and really great in depth study notes from the author. There really isn't any app on UT that just allows you to read the Bible in various languages or versions.
So, I decided to start making one! While it still has a long way to go, I'm very excited about the progress that has been made so far. Lots of times I've had to reach out to other developers for explainations and help on various aspects of this app, but, glory be to God, it really is coming along great!
The main idea behind the project is to use the Bible databases project, from Scrollmapper[2], to allow a QT interface app to download over 140 different Bible versions and let the user have one or two of them open at a time, be able to cross reference verses, change font size, and generally be able to read the Bible on their UT phone in a pleasant way.
So far, most of those objectives are met, leaving me to finish a few more features and start cleaning it up to look nice. I've had a lot of struggles with it, and learned quite a bit, and I feel like it is a much needed, and eternally rewarding project. If you want to check it out, feel free to drop by my gitlab for the commits! [1]
Linux - keep it simple.
[1] https://gitlab.com/alaskalinuxuser/everybible [2] https://github.com/scrollmapper/bible_databases
Updating older apps
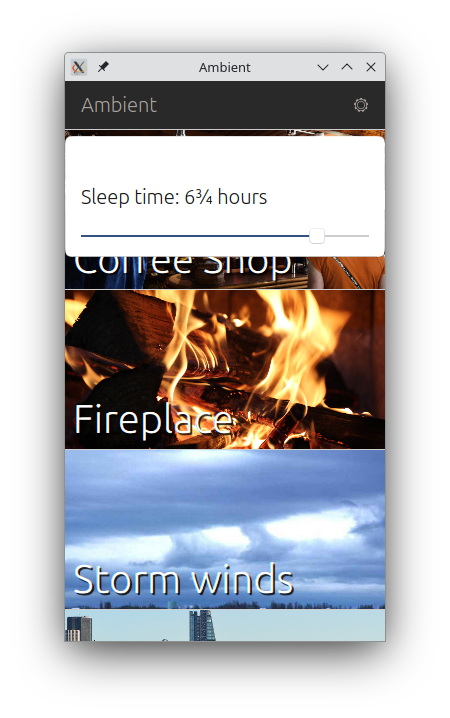
A friend of mine on Ubuntu Touch reached out to me the other day about one of the older apps that I maintain. It's called Ambient, which is a simple app that plays background noise for a set period of time. Apparently, my friend uses it every night to help them sleep. One of the limitations of the app was that it had a max time of 3 hours, which, presumably, a person using this for a sleep aid would want to sleep longer than. They requested I update the app to longer timers.
Figuring this to be a one line change, and not an unreasonable request, by any means, I looked at the code:
ListItem {
height: timerSlider.height + timerSliderLabel.height + units.gu(1) + 50
Column {
id: timerSetter
spacing: units.gu(1)
width: parent.width - units.gu(2)
anchors.horizontalCenter: parent.horizontalCenter
anchors.bottom: parent.bottom
Label {
id: timerSliderLabel
text: "Sleep time: " + timerLabel.formatTime(Math.round(timerSlider.value) * 15);
fontSize: "large"
width: parent.width
}
Slider {
id: timerSlider
minimumValue: 1
maximumValue: 12
value: settings.contents.timer / 15
function formatValue(v) { return timerLabel.formatTime(Math.round(v) * 15); }
width: parent.width
onValueChanged: {
settings.contents = {timer: Math.round(value) * 15};
}
}
}
}
Looks like it uses a slider that works on a min/max value of 1 to 12, and multiplies that by 15, which means the max time is 3 hours. A quick adjustment of maximumValue to 32 got me right where I needed to be at 8 hours total. Seemed to work well, and other than updating a few older Ubuntu.components to the new Lomiri.components, the app was done updating in no time. You can always check out the commits[1] if you'd like, and I put the newest version (1.6) on the openstore.
Linux - keep it simple.
[1] https://gitlab.com/alaskalinuxuser/ambient-ubuntu-phone/-/commits/master?ref_type=HEADS
NesJs for Ubuntu Touch
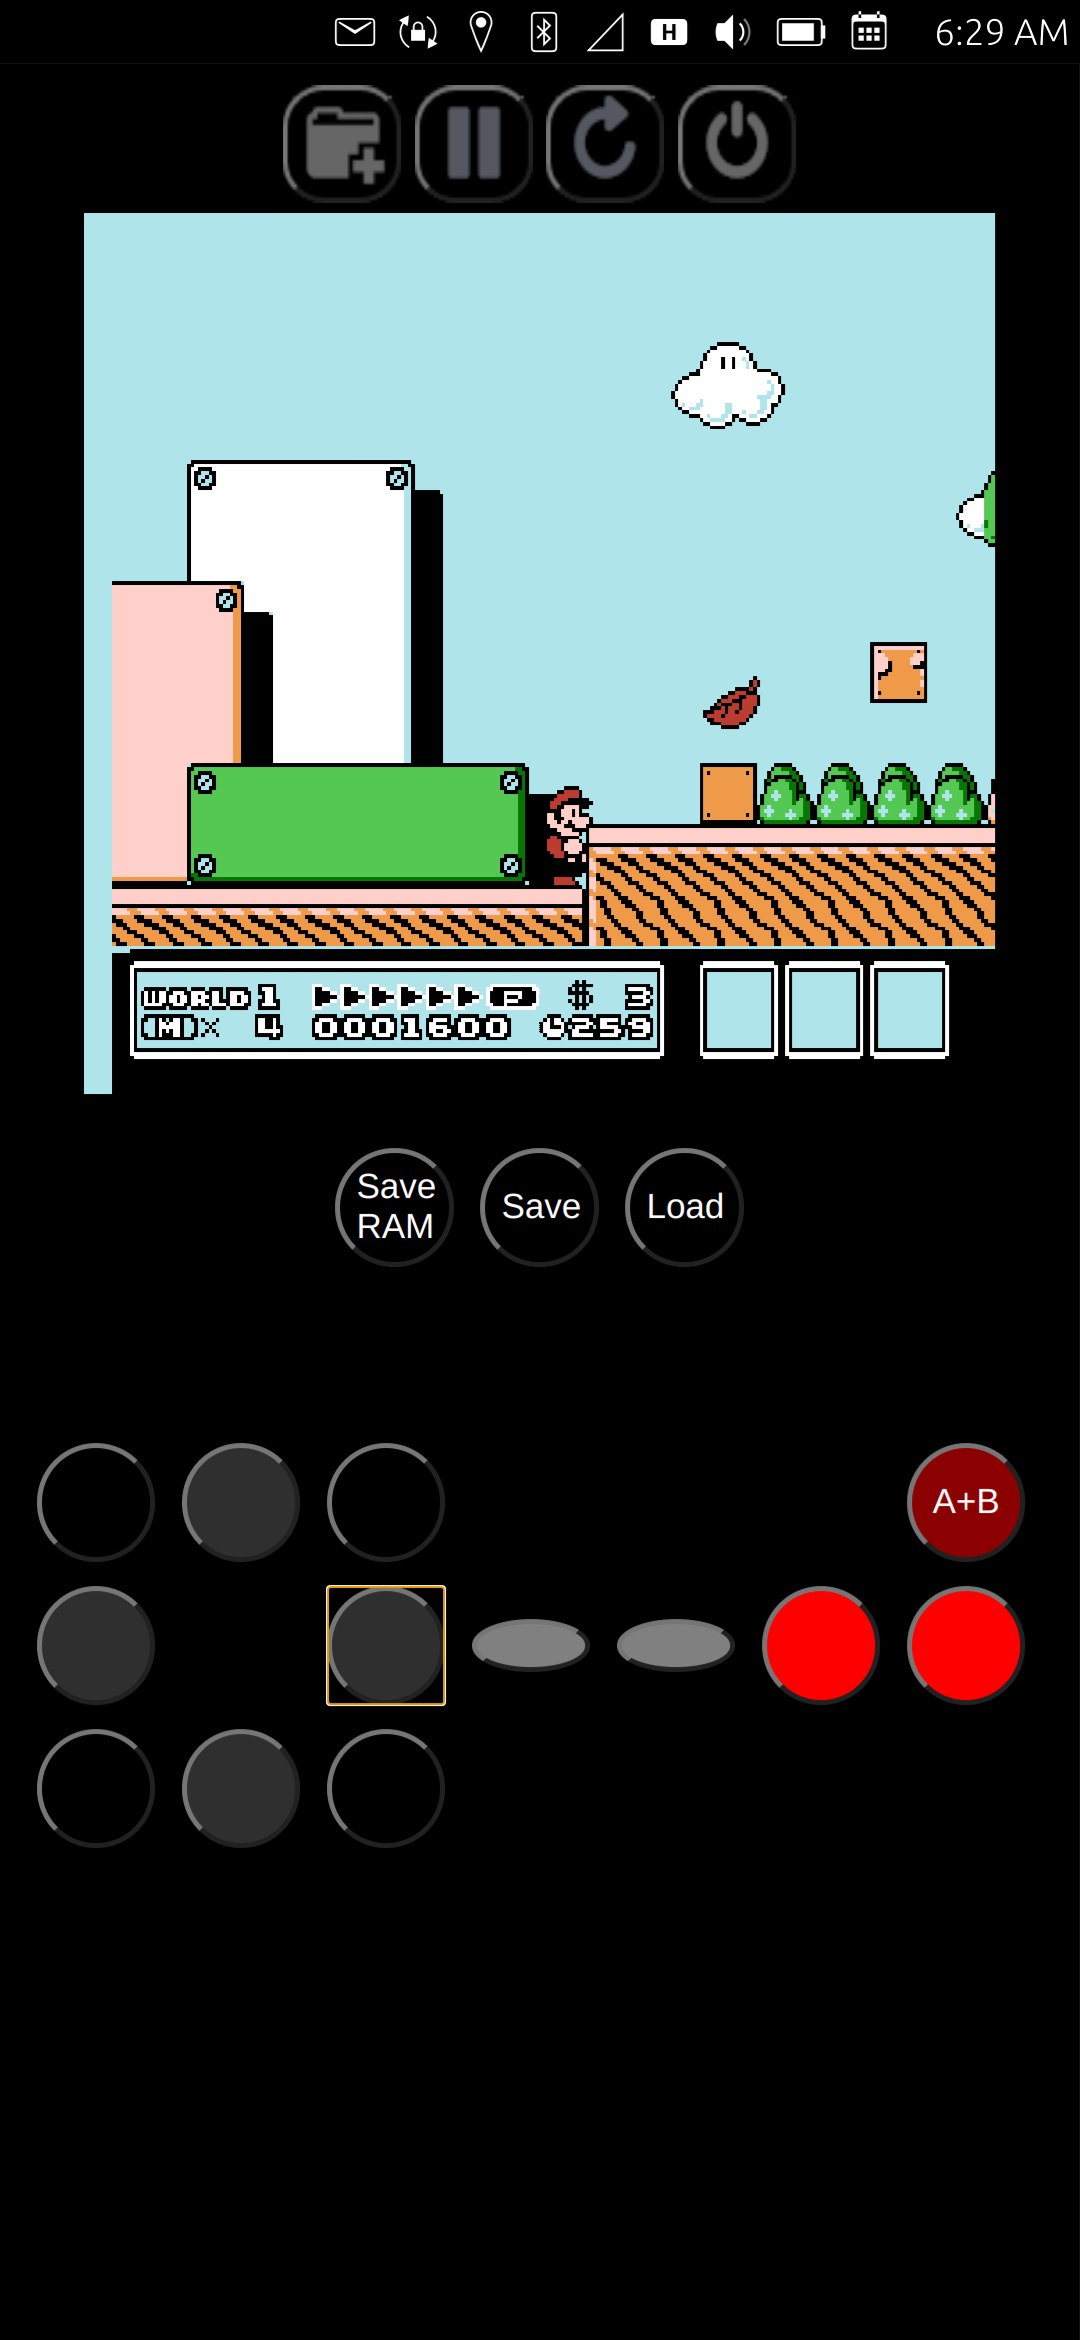
After several weeks of toying with it, I have finally completed my click of NesJs for Ubuntu Touch. Now, when I say that in the geek community, they typically think by NesJs, that I mean the really big NesJs library [3] that was written in typescript and is used in dozens of projects, but I actually used a lesser known project by the same name, written in javascript by Angelo-wf [1].
I have a much larger, and, in my opinion, important project that I am working on, called "EveryBible". However, I am stuck on part of it, and needed to learn a little bit more about javascript, because that is part and parcel of using QML, as all the syntax are the same, and any QML functions are just javascript. So I decided to do some learning on the subject by working through/on a NES emulator for Ubuntu Touch, which was written in javascript. Why a NES emulator? Well, because it speaks to my childhood, having grown up with the good old Nintendo Entertainment System, it has a fond place in my heart.
To be really clear, Angelo-wf had already completely finished writing the NesJs emulator, and all credit for that goes to them. What I did, though, was edit small amounts of the code to facilitate it's use in Ubuntu Touch. For instance, one of the things I edited was the mirrored over-scan of the original emulator. Angelo-wf's work was very thorough... perhaps too much so, emulating the real output of the NES, which included a part of the display which was not shown on regular TV screens, an over-scan section which mirrored the opposite side of the display. This was not useful, though, for the emulator, because the canvas on which it is displayed does not hide the over-scanned portion. Thus I removed it with a simple hack:
Original: this.pixelOutput = new Uint16Array(256 * 240);
Edit:
//this.pixelOutput = new Uint16Array(256 * 240);
// Alaskalinuxuser - change from original, cut off the 8 lines on the bottom, to get rid of the bottom overscan.
// read more about it here: https://www.nesdev.org/wiki/Myths#NTSC_picture_height
this.pixelOutput = new Uint16Array(256 * 232);
Essentially, I just changed the pixel output array to have 8 less lines, effectively cutting off the bottom eight lines of the screen where the over-scan was. I made several edits for the battery save function as well (well, technically the problem was in the loadRom function), to enable battery RAM saving and created buttons for loading and saving the game state.
Of course, I also made the on screen game pad controller, which went through several iterations before I finally settled on one. It works well enough for most games, like Tetris, Final Fantasy, 1943, or even Super Mario Bros. titles. However, it is a bit clunky for intense button mashing games like SuperC. Principally because one has to "let go" of a d-pad button to push another, rather than just slide over another button. Originally I went a different direction, where once you touched the screen, you could slide your fingers across any button, and they would just work, however it dramatically slowed down the emulator, so I abandoned that approach.
I was able to test the emulator on my phone using a Bluetooth keyboard, which worked great! Unfortunately, I don't have any Bluetooth game controllers, so I couldn't test that function, and when I posted it for beta testing, no one chimed in, so I do not know if they work or not.
Either way, it was a fun, shorter project, where I learned quite a few things, and got a bit of help from the Ubuntu Touch community for things I did not understand. I can only praise God that the final product works and is quite playable. You can always check out the code on my repo [2], which is licensed under an MIT license, as the original NesJs project was also licensed that way as well, most likely so it could be used as a library in another project.
Linux - keep it simple.
[1] https://github.com/angelo-wf/NesJs [2] https://gitlab.com/alaskalinuxuser/ut_nesjs [3] https://nesjs.netlify.app/