Continued hacking with a hex editor
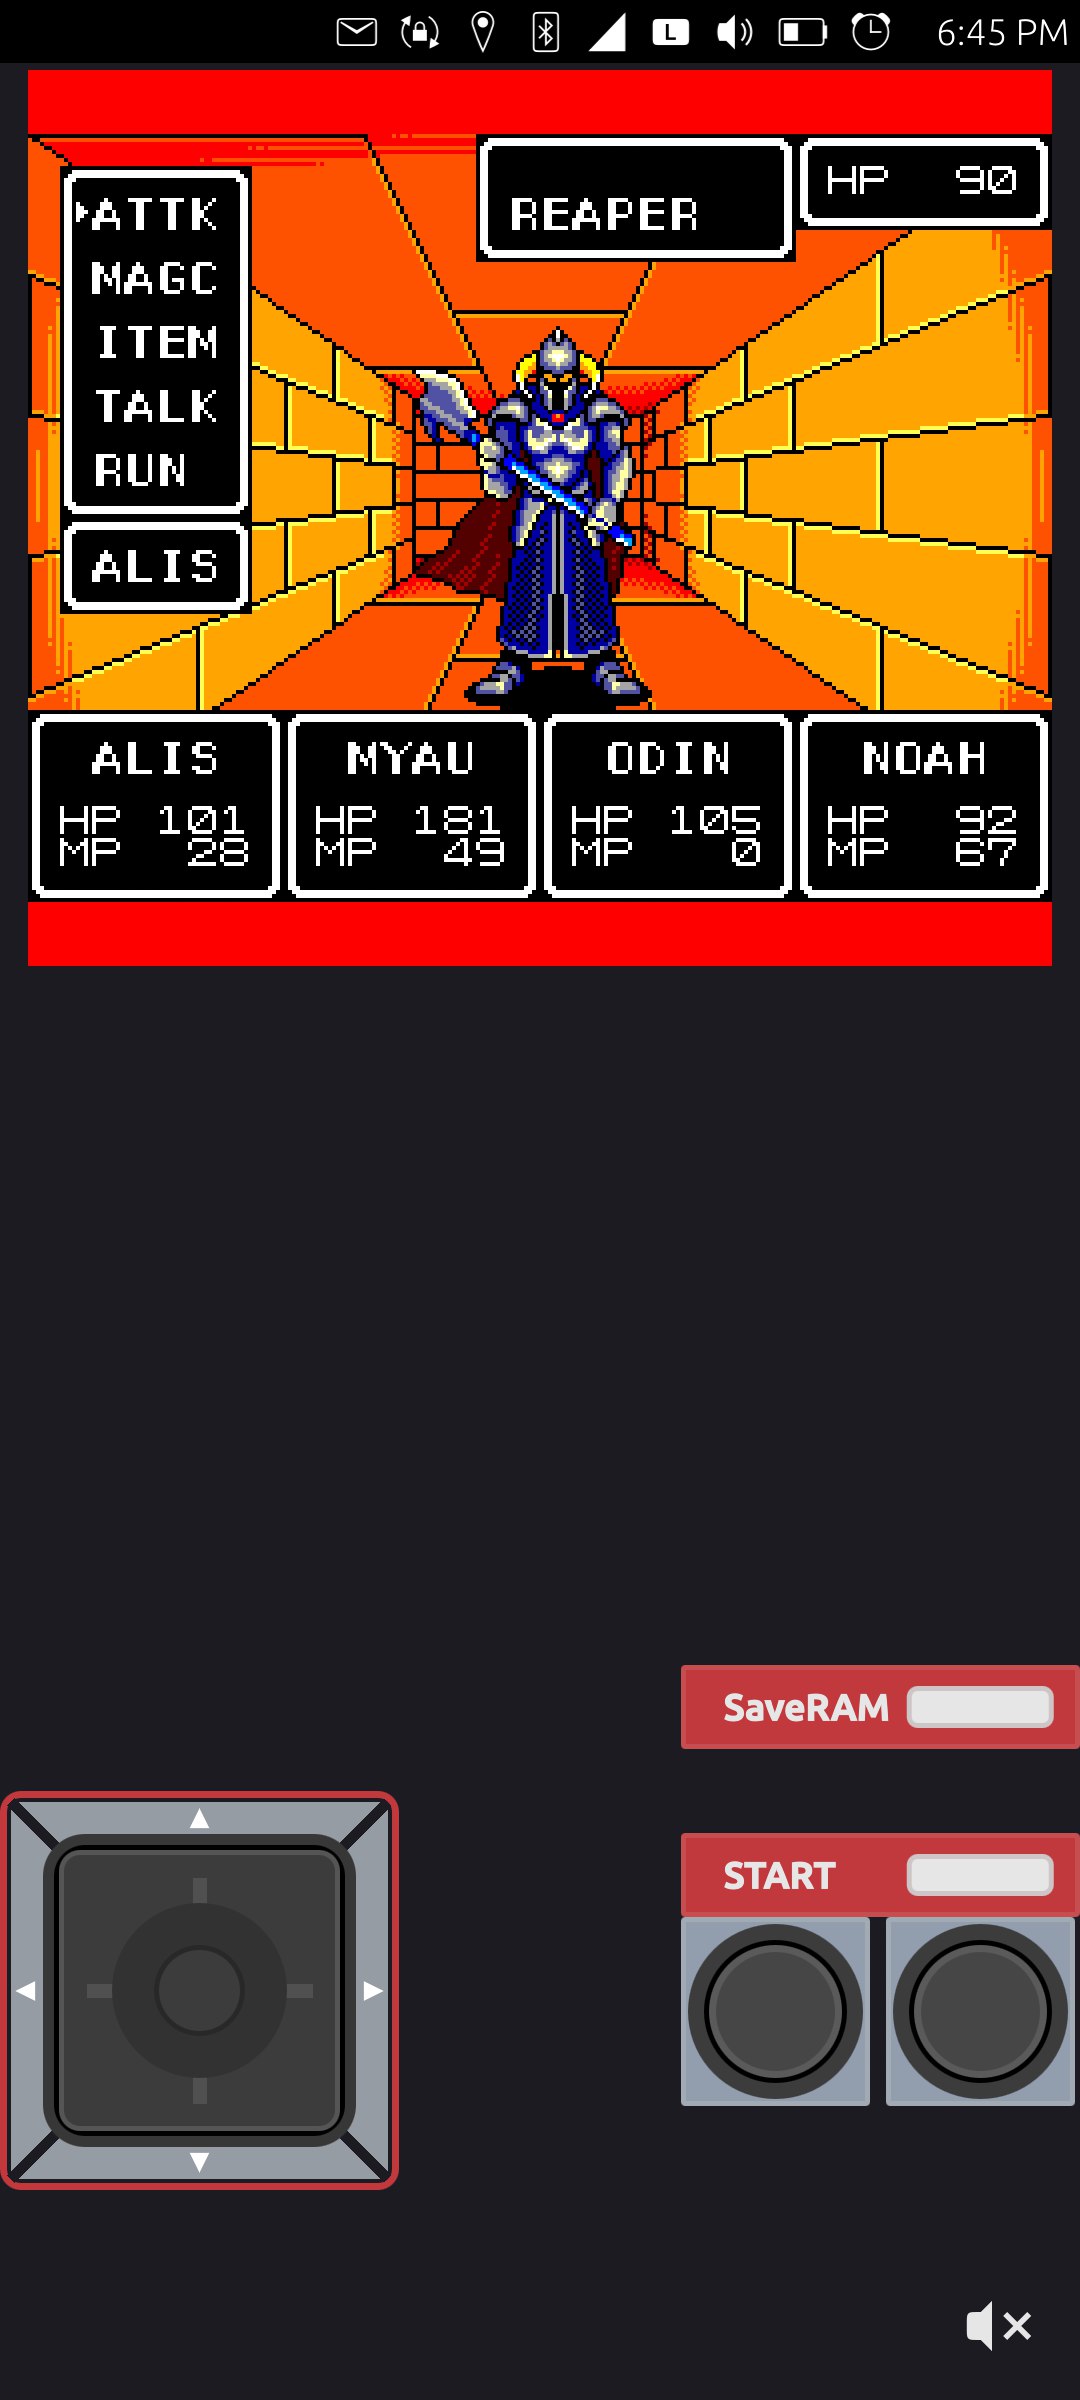
Since I finally beat the game, I decided to look a little deeper at hex editing the saved games of Phantasy Star for the SEGA Master System. While I am generally not a big fan of cheat codes and game hacking, I just kept looking at this hex data and started seeing a pattern. And once I saw it, I couldn't "un-see" it. For editing the saved RAM file, you can use any hex editor, but in my case I used Ghex on Ubuntu Linux, which has a nice GUI. Previously, I had used hexedit from the command line, which worked rather well, but made things like copy/paste a little more tedious.
As I mentioned last time, because I had already read a guide on save state hacking[1] for this game, I sort of had a good idea of what to look for. However, that saved state hack was for the saved state of the game with the MekaW emulator, not the actual saved backup RAM from the game. E.g., it is the RAM in use for the game, with register addresses that map to the running game, and not to the saved RAM of the cartridge. I also read some other guides, but they were for the newer SEGA Genesis version and also didn't apply. However, like I mentioned last post, I found a tool written in Go [2] which did have this helpful line:
// A Phantasy Star 1 save file consists of five saved games.
// A header of size 0x200 exists at position 0x100 in the save file.
// Assuming saved game indexes ("GameIndex") numbered 0 through 4, each saved
// game can be found in the file at location `0x500 + 0x400 * gamenum`.
// In other words, saved games start at index 0x500 and are each of size 0x400.
// Each saved game consists of four packed 16-byte PlayerRecord structures,
// representing Alis, Myau, Odin, and Noah. At offset 0xC0 in each saved game,
// there is a 32-byte array of inventory items. At offset 0xE0 in the saved
// game, a two-byte value can be found representing the number of meseta
// followed by a one-byte value representing the number of inventory items.
As I mentioned last time: If you use a hex editor like hexedit or ghex (terminal and gui, respectively), you will find that the first game save starts at 0x500, goes for 400, then the second game save starts at 0x900, goes for 400, and so on. And, a saved game looks like this:
00000500: 01cc 1c1a 5518 cc1c 6ee0 0e16 2000 0502 ....U...n... ...
00000510: 01ca 31e9 4d18 ca31 6eb6 0a14 1d00 0403 ..1.M..1n.......
00000520: 01bb 00cc 4e19 bb00 5cbd 0d17 1f00 0000 ....N...\.......
00000530: 01a8 4b8e 4516 a84b 4ab9 0418 1e00 0505 ..K.E..KJ.......
00000540: 0000 0000 0000 0000 0000 0000 0000 0000 ................
00000550: 0000 0000 0000 0000 0000 0000 0000 0000 ................
00000560: 0000 0000 0000 0000 0000 0000 0000 0000 ................
00000570: 0000 0000 0000 0000 0000 0000 0000 0000 ................
00000580: 0000 0000 0000 0000 0000 0000 0000 0000 ................
00000590: 0000 0000 0000 0000 0000 0000 0000 0000 ................
000005a0: 0000 0000 0000 0000 0000 0000 0000 0000 ................
000005b0: 0000 0000 0000 0000 0000 0000 0000 0000 ................
000005c0: 3334 352d 3832 2639 2122 3b0f 2330 313e 345-82&9!";.#01>
000005d0: 2525 2525 2525 2525 0000 0000 0000 0000 %%%%%%%%........
000005e0: 423f 1800 0000 0000 0000 0000 0000 0000 B?..............
000005f0: 0300 0000 0000 0000 0000 0000 0000 0000 ................
00000600: ff01 0102 0700 01ff 0101 ff00 0000 0000 ................
00000610: 00ff 0000 0000 0000 ff00 0000 0000 0000 ................
00000620: 0000 0000 0000 0000 0000 0000 0000 0000 ................
00000630: 0000 0000 0000 0000 0000 0000 0000 0000 ................
00000640: 0000 0000 0000 0000 0000 0000 0000 0000 ................
00000650: 0000 0000 0000 0000 0000 0000 0000 0000 ................
00000660: 0000 0000 0000 0000 0000 0000 0000 0000 ................
00000670: 0000 0000 0000 0000 0000 0000 0000 0000 ................
00000680: 0000 0000 0000 0000 0000 0000 0000 0000 ................
00000690: 0000 0000 0000 0000 0000 0000 0000 0000 ................
000006a0: 0000 0000 0000 0000 0000 0000 0000 0000 ................
000006b0: 0000 0000 0000 0000 0000 0000 0000 0000 ................
000006c0: 0000 0000 0000 0000 0000 0000 0000 0000 ................
000006d0: 0000 0000 0000 0000 0000 0000 0000 0000 ................
000006e0: 0000 0000 0000 0000 0000 0000 0000 0000 ................
000006f0: 0000 0000 0000 0000 0000 0000 0000 0000 ................
00000700: ffff 00ff ffff ff00 0000 0000 0000 0000 ................
00000710: 0000 0000 0000 0000 0000 0000 0000 0000 ................
00000720: 0000 0000 ff00 0000 0000 0000 0000 0000 ................
00000730: 00ff 0000 ff00 0000 0000 0000 0000 0000 ................
00000740: ff00 00ff 0000 0000 0000 00ff 0000 0000 ................
00000750: 0000 00ff 0000 ff00 0000 0000 0000 0000 ................
00000760: 0000 00ff 00ff ffff ff00 0000 00ff 00ff ................
00000770: ff00 ff00 0000 ffff ffff ff00 0000 0000 ................
00000780: 00ff 0000 0000 0000 0000 00ff 0000 ff00 ................
00000790: 0000 0000 0000 0000 0000 0000 0000 0000 ................
000007a0: 0000 0000 0000 0000 0000 0000 0000 0000 ................
000007b0: 0000 0000 0000 0000 0000 0000 0000 0000 ................
000007c0: ffff 0000 00ff 0000 0000 00ff ff00 ff00 ................
000007d0: 0000 0000 0000 0000 ff00 0000 0000 0000 ................
000007e0: 0000 0000 0000 0000 0000 0000 0000 0000 ................
000007f0: 0000 0000 0000 0000 0000 0000 0000 0000 ................
00000800: 00e0 0500 0050 0100 0404 0200 de00 0000 .....P..........
00000810: 0050 01e0 0500 0d03 0000 0000 0000 0000 .P..............
00000820: 0000 0000 0000 0000 0000 0000 0000 0000 ................
00000830: 0000 0000 0000 0000 0000 0000 0000 0000 ................
00000840: 0000 0000 0000 0000 0000 0000 0000 0000 ................
00000850: 0000 0000 0000 0000 0000 0000 0000 0000 ................
00000860: 0000 0000 0000 0000 0000 0000 0000 0000 ................
00000870: 0000 0000 0000 0000 0000 0000 0000 0000 ................
00000880: 0000 0000 0000 0000 0000 0000 0000 0000 ................
00000890: 0000 0000 0000 0000 0000 0000 0000 0000 ................
000008a0: 0000 0000 0000 0000 0000 0000 0000 0000 ................
000008b0: 0000 0000 0000 0000 0000 0000 0000 0000 ................
000008c0: 0000 0000 0000 0000 0000 0000 0000 0000 ................
000008d0: 0000 0000 0000 0000 0000 0000 0000 0000 ................
000008e0: 0000 0000 0000 0000 0000 0000 0000 0000 ................
000008f0: 0000 0000 0000 0000 0000 0000 0000 0000 ................
And what I noticed, based on the notes above, was these lines:
00000500: 01cc 1c1a 5518 cc1c 6ee0 0e16 2000 0502 ....U...n... ...
00000510: 01ca 31e9 4d18 ca31 6eb6 0a14 1d00 0403 ..1.M..1n.......
00000520: 01bb 00cc 4e19 bb00 5cbd 0d17 1f00 0000 ....N...\.......
00000530: 01a8 4b8e 4516 a84b 4ab9 0418 1e00 0505 ..K.E..KJ.......
These lines are the four main characters. Which I believe breaks down like this:
HADDRESS: AABB CCDD EEFF GGHH IIJJ KKLL MMNN OOPP
00000500: 01cc 1c1a 5518 cc1c 6ee0 0e16 2000 0502 ....U...n... ...
AA = Have character, e.g., you don't start the game with Odin, but this becomes 01 when you find him.
BB = MAX HP, maximum health points
CC = MAX MP, maximum magic points
DD = UNKNOWN, I originally thought level, but it doesn't quite line up.
EEFF = Experience points. The total accumulated experience points of the character.
GG = Current health points (HP)
HH = Current magic points (MP)
II = Attack power
JJ = Defense power
KK = Equiped Weapon
LL = Equiped Armor
MM = Equiped Shield
NN = Unknown
OOPP = Some sort of table reference for what magic spells are learned and available.
What I gleaned from other sites is that when a battle happens, at the beginning, or at the end, when the game adjusts the experience, then it calculates everything against what it should be. E.g., is your experience up, then you level up, and if you level up, your attack/defense/HP/MP should change, etc. What that means for you as an editor, it is easier to adjust the experience points, let the character get leveled up in a battle, and then it will automatically apply the rest, like what magic you have, etc.
Unless, of course, you are trying to have more than the original maximums that were available.
I'd have to do some trial and error for NN and DD. There are flags that are set if your character is "tied up" in a battle and needs to break free. This can carry over from battle to battle in a way that I don't fully understand as a game dynamic, but does seem to happen from time to time, because you can leave one battle tied up, get in another battle shortly after and still be tied up. I will be honest, I don't understand how "rope" works or if this even applies here. There is also a point in the game where Myau changes form from a cat to a pegasus-like creature, and perhaps this is used here?
As we discussed last time, the inventory of your 24 items is fairly simple:
000005c0: 3334 352d 3832 2639 2122 3b0f 2330 313e 345-82&9!";.#01>
000005d0: 2525 2525 2525 2525 0000 0000 0000 0000 %%%%%%%%........
Of which I just borrow from Czechnmymail[1]:
---Items---
00 = nothing
01 = Wood cane
02 = Short sword
03 = Iron sword
04 = Wand *Noah's best weapon*
05 = Iron Fang
06 = Iron axe
07 = Titanium sword
08 = Ceramic sword
09 = Needle gun
0A = Silver Fang *Myau's best weapon*
0B = Heat gun
0C = Light Sabre
0D = Laser gun
0E = Laconia sword *Alis' best weapon*
0F = Laconia Axe *Odin's best weapon*
10 = Leather Armor
11 = White mantle
12 = Light Suit
13 = Iron Armor
14 = Thick Fur *Myau's best armor*
15 = Zirconia Armor
16 = Diamond Armor *Alis' best armor*
17 = Laconia Armor *Odin's best Armor*
18 = Frade Mantle *Noah's best armor*
19 = Leather Shield
1A = Bronze Shield
1B = Iron Shield
1C = Ceramic Shield
1D = Gloves *Myau's best shield*
1E = Laser Shield *Noah's best shield*
1F = Mirror Shield *Odin's best shield*
20 = Laconia Shield *Alis' best shield*
21 = Landrover
22 = Hovercraft
23 = Ice digger
24 = Cola
25 = Burger
26 = Flute
27 = Flash
28 = Escaper
29 = Transfer
2A = Magic Hat
2B = Alsulin
2C = Polymeteral
2D = Dungeon Key
2E = Sphere
2F = Eclipse Torch
30 = Aero Prism
31 = Nuts
32 = Hapsby the Robot
33 = Road Pass
34 = Passport
35 = Compass
36 = Cake
37 = Letter
38 = Laconia Pot
39 = Magic Lamp
3A = Amber Eye
3B = Gas Shield
3C = Crystal
3D = M System
3E = Miracle Key
3F - FF = Debug
The money line was a bit odd:
000005e0: 423f 1800 0000 0000 0000 0000 0000 0000 B?..............
Because the hex to decimal conversion of 423f is 16959, but in the game I had 16194, which is 3f42. So I believe you need to do it out of order to get the correct result. Or just make it FFFF, and you have so much money it doesn't matter.
While I am not 100% sure, these lines seem to be your location. E.g., which planet, town, village, dungeon, and position within it.
00000600: ff01 0102 0700 01ff 0101 ff00 0000 0000 ................
00000610: 00ff 0000 0000 0000 ff00 0000 0000 0000 ................
And finally, these lines seem to be switches. They are high or low. Either on or off. FF being high/on, and 00 being low/off. I believe these are the switches for in game logic such as: did you talk to the guy in the dungeon who told you the soothsayer's name so that when you talk to the soothsayer, he asks you the right questions, or when you have freed the professor from his prison cell, so now when you talk to his apprentice he agrees to help you... etc.
00000700: ffff 00ff ffff ff00 0000 0000 0000 0000 ................
00000710: 0000 0000 0000 0000 0000 0000 0000 0000 ................
00000720: 0000 0000 ff00 0000 0000 0000 0000 0000 ................
00000730: 00ff 0000 ff00 0000 0000 0000 0000 0000 ................
00000740: ff00 00ff 0000 0000 0000 00ff 0000 0000 ................
00000750: 0000 00ff 0000 ff00 0000 0000 0000 0000 ................
00000760: 0000 00ff 00ff ffff ff00 0000 00ff 00ff ................
00000770: ff00 ff00 0000 ffff ffff ff00 0000 0000 ................
00000780: 00ff 0000 0000 0000 0000 00ff 0000 ff00 ................
00000790: 0000 0000 0000 0000 0000 0000 0000 0000 ................
000007a0: 0000 0000 0000 0000 0000 0000 0000 0000 ................
000007b0: 0000 0000 0000 0000 0000 0000 0000 0000 ................
000007c0: ffff 0000 00ff 0000 0000 00ff ff00 ff00 ................
000007d0: 0000 0000 0000 0000 ff00 0000 0000 0000 ................
000007e0: 0000 0000 0000 0000 0000 0000 0000 0000 ................
So that is my best guess and somewhat verified with some trial and error. I am 99% positive on the characters stats and equipment, 100% positive on the inventory items, and while I am pretty positive about the rest, I don't know how to actually use them.
I don't know if this will help anybody, but, there it is.
Linux - keep it simple.
[1] https://gamefaqs.gamespot.com/sms/588116-phantasy-star/faqs/24768 [2] https://github.com/mpontillo/psedit/blob/master/savefile.go
Hacking with a hex editor and why I needed to cheat
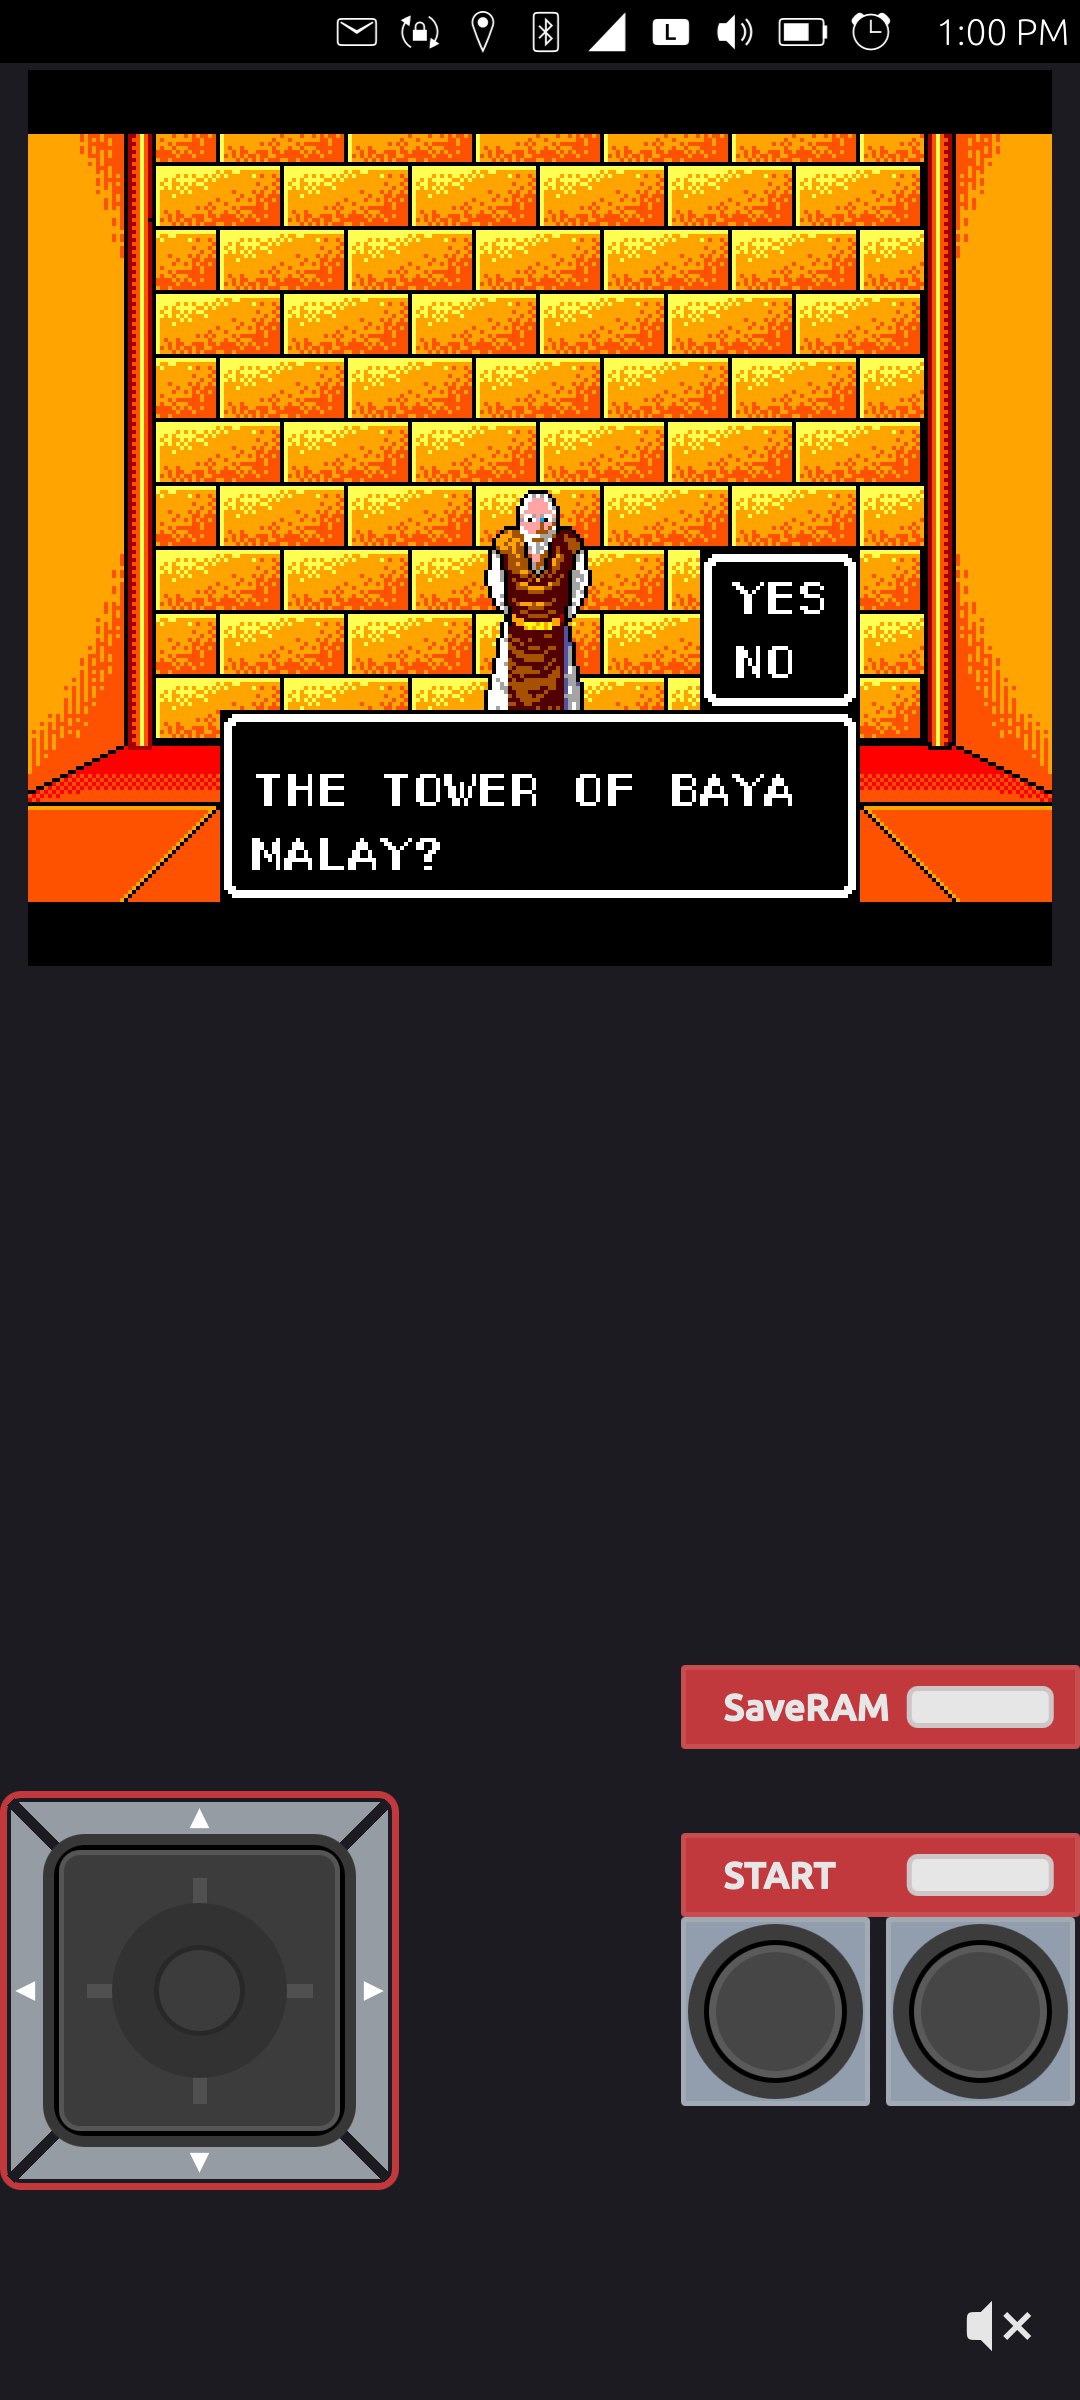
After doing all that work to make the "SaveRAM" function of Gearsystem work on Ubuntu Touch, I figure I better give it a good test by playing through a game that uses it. If you are unfamiliar, my previous post is all about how I fixed the SaveRAM function so you could save the game ram to disk and have persistent games in the Gearsystem emulator. E.g., the ability to save your in game saves. So, I played through Phantasy Star to test it out.
First, while this is not a Phantasy Star review, I have to say, for a game made in the late 1980's, it is a really impressive game. It featured a top down "overworld" view while you travel from town to town. However, it had an amazing (for the time) 3D dungeon/cave/tower view which was really ahead of its time and made for some great game play. That said, this was also the TOUGHEST RPG I have EVER played. Since the dungeons are 3D in 1st person view, you had to remember every turn and way to go in each and every dungeon, and some of them were incredibly difficult mazes. One was so complicated that I eventually looked up a map just to get through it, because it had many "pitfall" traps, where the floor would collapse under your characters and drop you on some other floor, to which you don't know if it was a place you had been before or a new part of the maze. For a 4 MB cartridge, I'd say they did really well!
But, there was another reason the game was so tough, and why specifically I needed to cheat. I suppose looking up that map might be considered cheating too, I kind of figure it was more of a "time saver", but I'd accept that looking at the map was cheating too. However, what makes the game REALLY HARD is not the fact that you can get killed by just about anything, or that the mazes are so convoluded, or that you can only carry 24 items, so health restoring burgers are limited (the game designers use cola and burgers to heal you, rather than something exotic like potions). What makes the game REALLY HARD is that the game is not presented linearly, so you can go anywhere at just about any time. However, you need to talk to certain non playable characters in a linear order to advance the story line.
What that means is if you miss talking to some dude sometime and progress through the game, you can't find the thing you need or get the information you need from a different place/character. And in my case, SPOILER at the end of the game, I tried to fight what I thought was the last boss (turns out there is more game after that!) and he roasts me instantaneously to a crisp. I tried to level up more, I have the best armor available, the legendary weapons told about in lore, and I still could not beat him. After several hours (counting leveling up more) I finally gave up and read a walkthrough guide. Turns out I need a crystal from a soothsayer in a dungeon. I actually had talked to that guy, but all he did was warn me to leave now before I am destroyed.
Reading the guide, it turns out that he is supposed to ask me 5 questions. I need to know to answer these questions a certain way, and then he gives me the crystal which protects me from the big boss' death ray. But he doesn't ask me those questions! So I read back through the guide, and there is another guy in a dungeon cell locked up in a tower that I have to talk to first, who tells me the soothsayer's name. So I trekked all the way out of this dungeon, back through the lava, through the scion cave maze, through the prison back to the main town, to the star port, through the manhole cover to the village of Gothic, into my personal space ship, flew all the way to another planet, through a series of maze-like caves, back to another tower, down to it's dungeon, and talked to that guy. He told me the name of the soothsayer, and I trekked all the way back, fighting dragons, zombies, reapers, and whatnot, only to get back to the soothsayer and he still didn't ask me the right questions!
So, I read through the whole guide from the start to when I should get the crystal. Nothing mentioned that I didn't do, that I know of. I believe that the only way to solve this is to talk to every person on every planet until I find someone who mentions something about the crystal, or Lassic, or soothsayer, and then come back and he will ask me the right questions. Only the entire population of 3 planets to talk to, so that shouldn't take long, right? I tried it, gave up after an hour on the first planet.
So, I decided to cheat and just give myself the crystal instead.
I thought it would be easy because I read a guide on save state hacking[1] for this game. But it turns out, that saved state hack was for the saved state of the game with the MekaW emulator, not the actual saved backup RAM from the game. E.g., the file I get from the backup with Gearsystem is the actual saved backup RAM as if you had the original cartridge, not the save state file you get from the MekaW emulator, which is a snapshot of the running game. For instance, the guide said that at address 0547 and 0548, there would be the hex for how much money your party had, but in the savedRAM, those areas are not that, in fact those addresses are blank, but I now I have lots of money in my game, from leveling up to try to fight the last boss and nothing left to spend the money on.
I tried to read some other guides, but they were for the newer SEGA Genesis version and also didn't apply. However, I did find some DOS command line tools made specifically for this purpose, but I use Linux, so I couldn't use them without setting up Wine or something like that. However, I found a tool written in Go [2] which didn't tell me what the hex codes were, but did have this helpful line:
// A Phantasy Star 1 save file consists of five saved games.
// A header of size 0x200 exists at position 0x100 in the save file.
// Assuming saved game indexes ("GameIndex") numbered 0 through 4, each saved
// game can be found in the file at location `0x500 + 0x400 * gamenum`.
// In other words, saved games start at index 0x500 and are each of size 0x400.
// Each saved game consists of four packed 16-byte PlayerRecord structures,
// representing Alis, Myau, Odin, and Noah. At offset 0xC0 in each saved game,
// there is a 32-byte array of inventory items. At offset 0xE0 in the saved
// game, a two-byte value can be found representing the number of meseta
// followed by a one-byte value representing the number of inventory items.
Ah-ha! Now I could use the hex codes from the first[1] website with the note from the second[2] website and hack my game. If you use a hex editor like hexedit or ghex (terminal and gui, respectively), you will find that the first game save starts at 0x500, goes for 400, then the second game save starts at 0x900, goes for 400, and so on. And, a saved game looks like this:
00000500: 01cc 1c1a 5518 cc1c 6ee0 0e16 2000 0502 ....U...n... ...
00000510: 01ca 31e9 4d18 ca31 6eb6 0a14 1d00 0403 ..1.M..1n.......
00000520: 01bb 00cc 4e19 bb00 5cbd 0d17 1f00 0000 ....N...\.......
00000530: 01a8 4b8e 4516 a84b 4ab9 0418 1e00 0505 ..K.E..KJ.......
00000540: 0000 0000 0000 0000 0000 0000 0000 0000 ................
00000550: 0000 0000 0000 0000 0000 0000 0000 0000 ................
00000560: 0000 0000 0000 0000 0000 0000 0000 0000 ................
00000570: 0000 0000 0000 0000 0000 0000 0000 0000 ................
00000580: 0000 0000 0000 0000 0000 0000 0000 0000 ................
00000590: 0000 0000 0000 0000 0000 0000 0000 0000 ................
000005a0: 0000 0000 0000 0000 0000 0000 0000 0000 ................
000005b0: 0000 0000 0000 0000 0000 0000 0000 0000 ................
000005c0: 3334 352d 3832 2639 2122 3b0f 2330 313e 345-82&9!";.#01>
000005d0: 2525 2525 2525 2525 0000 0000 0000 0000 %%%%%%%%........
000005e0: 423f 1800 0000 0000 0000 0000 0000 0000 B?..............
000005f0: 0300 0000 0000 0000 0000 0000 0000 0000 ................
00000600: ff01 0102 0700 01ff 0101 ff00 0000 0000 ................
00000610: 00ff 0000 0000 0000 ff00 0000 0000 0000 ................
00000620: 0000 0000 0000 0000 0000 0000 0000 0000 ................
00000630: 0000 0000 0000 0000 0000 0000 0000 0000 ................
00000640: 0000 0000 0000 0000 0000 0000 0000 0000 ................
00000650: 0000 0000 0000 0000 0000 0000 0000 0000 ................
00000660: 0000 0000 0000 0000 0000 0000 0000 0000 ................
00000670: 0000 0000 0000 0000 0000 0000 0000 0000 ................
00000680: 0000 0000 0000 0000 0000 0000 0000 0000 ................
00000690: 0000 0000 0000 0000 0000 0000 0000 0000 ................
000006a0: 0000 0000 0000 0000 0000 0000 0000 0000 ................
000006b0: 0000 0000 0000 0000 0000 0000 0000 0000 ................
000006c0: 0000 0000 0000 0000 0000 0000 0000 0000 ................
000006d0: 0000 0000 0000 0000 0000 0000 0000 0000 ................
000006e0: 0000 0000 0000 0000 0000 0000 0000 0000 ................
000006f0: 0000 0000 0000 0000 0000 0000 0000 0000 ................
00000700: ffff 00ff ffff ff00 0000 0000 0000 0000 ................
00000710: 0000 0000 0000 0000 0000 0000 0000 0000 ................
00000720: 0000 0000 ff00 0000 0000 0000 0000 0000 ................
00000730: 00ff 0000 ff00 0000 0000 0000 0000 0000 ................
00000740: ff00 00ff 0000 0000 0000 00ff 0000 0000 ................
00000750: 0000 00ff 0000 ff00 0000 0000 0000 0000 ................
00000760: 0000 00ff 00ff ffff ff00 0000 00ff 00ff ................
00000770: ff00 ff00 0000 ffff ffff ff00 0000 0000 ................
00000780: 00ff 0000 0000 0000 0000 00ff 0000 ff00 ................
00000790: 0000 0000 0000 0000 0000 0000 0000 0000 ................
000007a0: 0000 0000 0000 0000 0000 0000 0000 0000 ................
000007b0: 0000 0000 0000 0000 0000 0000 0000 0000 ................
000007c0: ffff 0000 00ff 0000 0000 00ff ff00 ff00 ................
000007d0: 0000 0000 0000 0000 ff00 0000 0000 0000 ................
000007e0: 0000 0000 0000 0000 0000 0000 0000 0000 ................
000007f0: 0000 0000 0000 0000 0000 0000 0000 0000 ................
00000800: 00e0 0500 0050 0100 0404 0200 de00 0000 .....P..........
00000810: 0050 01e0 0500 0d03 0000 0000 0000 0000 .P..............
00000820: 0000 0000 0000 0000 0000 0000 0000 0000 ................
00000830: 0000 0000 0000 0000 0000 0000 0000 0000 ................
00000840: 0000 0000 0000 0000 0000 0000 0000 0000 ................
00000850: 0000 0000 0000 0000 0000 0000 0000 0000 ................
00000860: 0000 0000 0000 0000 0000 0000 0000 0000 ................
00000870: 0000 0000 0000 0000 0000 0000 0000 0000 ................
00000880: 0000 0000 0000 0000 0000 0000 0000 0000 ................
00000890: 0000 0000 0000 0000 0000 0000 0000 0000 ................
000008a0: 0000 0000 0000 0000 0000 0000 0000 0000 ................
000008b0: 0000 0000 0000 0000 0000 0000 0000 0000 ................
000008c0: 0000 0000 0000 0000 0000 0000 0000 0000 ................
000008d0: 0000 0000 0000 0000 0000 0000 0000 0000 ................
000008e0: 0000 0000 0000 0000 0000 0000 0000 0000 ................
000008f0: 0000 0000 0000 0000 0000 0000 0000 0000 ................
Which doesn't line up with the first[1] website, but this was still really useful. I knew that I had eight burgers. And the hex code for a burger, per the second[2] website was 37. Well, searching for 37 didn't reveal anything. But per the first website was 25. Look at this line:
000005c0: 3334 352d 3832 2639 2122 3b0f 2330 313e 345-82&9!";.#01>
000005d0: 2525 2525 2525 2525 0000 0000 0000 0000 %%%%%%%%........
Wait a minute! That second line is 2525 2525 2525 2525, which is 8 burgers! Further, if each quad is two items, and you can only carry 24 items total in the game, then those two lines equal 24 items! Further study revealed that 33, 34, and 35 are the roadpass, passport, and compass, which are my first three items in my inventory!
So, how do I solve my original problem? Remember, I needed to get the crystal from the soothsayer. So, I just gave myself the crystal by changing one of the burgers (25) to be the crystal (3C). Then I just copied the saved file back to the phone, put it back in the proper folder for the emulator SaveRAM files, and when I loaded Phantasy Star, it worked! Saved game slot 1 had all my usual stuff, but the last burger was now the crystal.
By the way, that boss wasn't the final boss, and even with the crystal he is still pretty tough!
Linux - keep it simple.
[1] https://gamefaqs.gamespot.com/sms/588116-phantasy-star/faqs/24768 [2] https://github.com/mpontillo/psedit/blob/master/savefile.go
Saving persistent RAM in Gearsystem
As I have been playing around with Gearsystem on Ubuntu Touch lately, I decided it was time to tackle a way to save the game. If you are unfamiliar, you can check out my previous posts about Gearsystem, but it is an emulator that was originally written by Ignacio Sanchez[1] and then ported to Ubuntu Touch by Ryan Pattison[2]. This emulator allows you to play SEGA Game Gear and Master System games, and newer versions of this emulator allow you to play other systems as well.
One might wonder, after reading that statement, why I don't update this fork to use the latest emulator. I could, but it wouldn't be easy for a fellow with low end programming skills like me. This older version of Gearsystem was written to use QT/QML, which functions nicely with Ubuntu Touch, while the newer versions do not follow that scheme, and would require a lot more custom work on my end.
Anyhow, if you are familiar with playing ROMs of games in emulators, then you know a really key feature is the ability to save the game. Some cartridges, such as (in this case, for a SEGA Master System) Phantasy Star or Crystal Warriors, have a built in save function that is part of the game. This is called persistent memory or peristent RAM. Other titles get around this by using a password or code that allows you to jump to later levels, like Mega Man or King's Quest. And still further, other titles just don't allow any sort of saving at all, like Captain America or Street Fighter II, where the game is designed to be played straight through in one sitting. Most emulators allow something called "Saved States" that allow you to save the game, as is, where is, and reload it at will at any moment. Other emulators have the ability to "Save RAM", which allows you to use built in game saving functions of the cartridge, and reload it later, as if you were playing on a physical console.
At first I decided to add the Save State style of game saving feature. I went so far as to create the custom buttons for it [3]. I messed with making it work for several hours [4], but it ended up being a bit more than my meager programming skills could handle, so I tabled that for now, and decided instead to work on the Save RAM feature instead. Particularly because the original author had already created a saveRAM and loadRAM feature. Unfortunately, they didn't function.
If you don't have time for the rest of the article, and just want to see the end result, you can check out my commit on gitlab [5] where I finally fixed it. If you're here for the story, well, hopefully telling it will not take as long as fixing it did!
As I mentioned, there was already a LoadRAM function, which would load the game cartrides persistent memory when the game ROM was selected and loaded. For the rest of the article, I am going to use Phantasy Star as the reference ROM, so all paths will be realative to that game. Essentially, from what I understood, there is a variable called 'defaultSavePath()' that is based on the name of the ROM you load, in this case, when you load the Phantasy Star ROM, the emulator will check '/home/phablet/.local/share/alaskalinuxuser.gearsystem/PhantasyStar.gearsystem' to see if it exists, and if it does, it loads it, because it should be the persistent RAM of the game cartridge, e.g. the saved games. This is called automatically when the ROM is first loaded, which is a plus, as I felt I didn't need to do anything here.
There was also a SaveRAM function, which, once called, would read the cartridge persistent RAM and save it to disk at '/home/phablet/.local/share/alaskalinuxuser.gearsystem/PhantasyStar.gearsystem'. The first problem with this was that there was nothing that I could find, which called it. So, I spent several hours trying to figure out if I could find the part of the code where the emulator actually wrote in game saving of games to the persisent RAM, so I could piggy back off of that function to allow the emulator to write that, and then call this SaveRAM function. Again, my meager skills didn't prove useful here, and I couldn't figure out when and where that happened, so I couldn't use that to trigger saving the RAM. I also considered some sort of timer function that just called the SaveRAM function regularly, but quickly abandoned that because it would waste resources and would be a bummer if you saved your game, then turned off the emulator, and it had not reached the timer to then save you data. Instead, I decided to make a button for it.
While certainly not ideal, as I would have prefered it to be automatic, but having a button proved to be a very easy way to call the SaveRAM function. Essentially, it would be on the user to first save their game, in game, like normal, and then to physically press the SaveRAM button to back up that save to their phone. A bit clunky, but useable. The button code was pretty easy, as I stole the code from the START button and just added a slot/signal for it in the Main.qml file:
save.pressed.connect(emu.savePressed)
save.released.connect(emu.saveReleased)
//////////////////////
ButtonPanel {
id: save
anchors.top: parent.top
myTextLabel: "SaveRAM"
y: units.gu(2)
width: parent.width
height: units.gu(4)
onPressed: click()
}
And the corresponding c++ in the GSEmulator.h header file:
void savePressed();
void saveReleased();
And in the GSEmulator.cpp file:
void GSEmulator::savePressed()
{
m_emu->save();
}
void GSEmulator::saveReleased()
{
// Do nothing
}
Being ever optimistic, I thought that if I just called the SaveRAM function, it would all work, and my task would be done for the day. Unfortunately, when called, the SaveRAM function didn't work as intended. The console log spit out an error that said:
'Failed to save RAM to: /home/phablet/.local/share/alaskalinuxuser.gearsystem/PhantasyStar.gearsystem'
Bummer, and I thought this would be easy! Looking at saveRAM function, I couldn't see anything wrong with it, though my skills are somewhat limited. The actual call was first to EmulationRunner::save(), which looked like this:
void EmulationRunner::save()
{
m_lock.lock();
QString path = defaultSavePath();
if (!path.isNull()) {
qDebug() << "Saving Game to: " << path;
if (not m_core.SaveRam(path.toStdString().c_str())) {
qDebug() << "Failed to save ram to: " << path;
}
} else {
qDebug() << "No Game Loaded to Save";
}
m_lock.unlock();
}
And this function calls core.SaveRam, from GearSystemCore.cpp, which looked like this:
bool GearsystemCore::SaveRam(const char* szPath)
{
if (m_pCartridge->IsReady() && IsValidPointer(m_pMemory->GetCurrentRule()) && m_pMemory->GetCurrentRule()->PersistedRAM())
{
Log("Saving RAM...");
using namespace std;
char path[512];
if (IsValidPointer(szPath))
{
strcpy(path, szPath);
strcat(path, "/");
strcat(path, m_pCartridge->GetFileName());
}
else
{
strcpy(path, m_pCartridge->GetFilePath());
}
strcat(path, ".gearsystem");
Log("Save file: %s", path);
ofstream file(path, ios::out | ios::binary);
m_pMemory->GetCurrentRule()->SaveRam(file);
Log("RAM saved");
}
return false;
}
Hmmm.... Odd, wonder why it doesn't work? So I decided to add qdebug statements in to get more logging. I started with this:
bool GearsystemCore::SaveRam(const char* szPath)
{
qDebug() << "SaveRam called.";
if (m_pCartridge->IsReady() && IsValidPointer(m_pMemory->GetCurrentRule()) && m_pMemory->GetCurrentRule()->PersistedRAM())
Just to check if the function was actually ever called. In the console, it would return that phrase, 'SaveRam called.', so I knew the function was being called. Then I decided to put a qdebug statement in the first if statement, to make sure it actually decided that the if statement was true and would actually try to save the RAM to file, like so:
if (m_pCartridge->IsReady() && IsValidPointer(m_pMemory->GetCurrentRule()) && m_pMemory->GetCurrentRule()->PersistedRAM())
{
Log("Saving RAM...");
qDebug() << "SaveRam cartridge is ready.";
/////////And furth down, at the end of the if statement///////
}
qDebug() << "SaveRam cartridge not ready.";
return false;
I figured this would show me the cartridge was ready when the if statement was true, and would show me the cartridge not ready warning when the if statement was false. To be honest, I expected the false output. Oddly, I got both?! Wait, then the if statement was true, or it wouldn't return the cartridge is ready line, and yet is still gave the cartridge is not ready answer also?! I had to think about this for a while, but then it hit me! There is a 'return false' statement if the cartridge is not ready, but there was no 'return true' statement if it did save the RAM to disk! So, I added one:
m_pMemory->GetCurrentRule()->SaveRam(file);
Log("RAM saved");
return true;
}
qDebug() << "SaveRam cartridge not ready.";
return false;
}
Ah-ha! Now when I pushed the SaveRAM button, the console would return 'SaveRam cartridge is ready.', and not say that the function failed! However, it didn't actually write the file. This made my head hurt, and I tried web searching the code snippets over and over to find a problem with them, and I kept coming back to the conclusion, in my weak programming skills, that this code should just work. So why didn't it?
While taking a break, I started talking with my brother, who is very intelligent, and he suggested that I check the path to make sure it is right and readable. It was this gem of wisdom that eventually lead me to the problem. I put in a bunch of qdebug statements to read the path the emulator was trying to write to throughout the save process and found something interesting... my code looked like this:
bool GearsystemCore::SaveRam(const char* szPath)
{
qDebug() << "SaveRam called.";
if (m_pCartridge->IsReady() && IsValidPointer(m_pMemory->GetCurrentRule()) && m_pMemory->GetCurrentRule()->PersistedRAM())
{
Log("Saving RAM...");
qDebug() << "SaveRam cartridge is ready.";
using namespace std;
char path[512];
if (IsValidPointer(szPath))
{
qDebug() << "SaveRam isvalidpointer.";
strcpy(path, szPath);
strcat(path, "/");
strcat(path, m_pCartridge->GetFileName());
qDebug() << path;
}
else
{
qDebug() << "SaveRam notvalidpointer.";
strcpy(path, m_pCartridge->GetFilePath());
qDebug() << path;
}
strcat(path, ".gearsystem");
qDebug() << path;
Log("Save file: %s", path);
qDebug() << "SaveRam logging path.";
qDebug() << path;
ofstream file(path, ios::out | ios::binary);
qDebug() << path;
m_pMemory->GetCurrentRule()->SaveRam(file);
qDebug() << path;
Log("RAM saved");
qDebug() << "SaveRam RAM saved.";
return true;
}
qDebug() << "SaveRam cartridge not ready.";
return false;
}
As I mentioned above, it originally said 'Failed to save RAM to: /home/phablet/.local/share/alaskalinuxuser.gearsystem/PhantasyStar.gearsystem'. I thought that it was trying to write a file, PhantasyStar.gearsystem, in the directory of /home/phablet/.local/share/alaskalinuxuser.gearsystem/. But when I got the output of the qdebug paths, I realized that PhantasyStar.gearsystem should be a directory! The output was:
'/home/phablet/.local/share/alaskalinuxuser.gearsystem/PhantasyStar.gearsystem/PhantasyStar.zip.gearsystem'
Where PhantasyStar.zip.gearsystem was the file written, so named on the actual filename of the ROM you loaded, and PhantasyStar.gearsystem was the folder it was expected to be in, based on the name of the ROM without the file type! It coulnd't write to it, because the folder didn't exist! The path was 'wrong'! I did a quick and dirty test by creating the folder manually, and launching the emulator again. Low and behold, it would then work and save the file! Praise God for showing me where to go, and giving me such a helpful brother!
Well, I will cut to the chase on the next three hours, because I didn't realize that this emulator was written in c++11 instead of more modern versions like 17, so you can't use the std::filesystem commands/functions to create new directories. In the end, I added this bit of code to the EmmulationRunner.cpp file:
// For Creating directory.
#include <sys/stat.h>
#include <sys/types.h>
#include <iostream>
/////////And furth down///////
}
}
void createDirectory(const std::string& path) {
struct stat info;
if (stat(path.c_str(), &info) != 0) { // Check if the directory exists
mkdir(path.c_str(), 0777); // Create the directory with permissions
} else if (info.st_mode & S_IFDIR) {
std::cout << "Directory already exists." << std::endl;
} else {
std::cout << "A file with the same name exists." << std::endl;
}
}
void EmulationRunner::save()
{
m_lock.lock();
QString path = defaultSavePath();
if (!path.isNull()) {
qDebug() << "Saving Game to: " << path;
// make this folder now if it doesn't exist.
std::string myPath = path.toStdString();
createDirectory(myPath);
if (not m_core.SaveRam(path.toStdString().c_str())) {
qDebug() << "Failed to save ram to: " << path;
}
I also had to convert the Qstrings to std::strings for this to work, but that was pretty easy with the toStdString() bit. Technically, I should probably adjust the folder permissions, but at this point I was just happy that it all worked! Now people using the GearSystem click on Ubuntu Touch can save their games if the game has a built in save function!
Linux - keep it simple.
[1] https://github.com/drhelius/Gearsystem [2] https://gitlab.com/ferrettim/gearsystem [3] https://gitlab.com/alaskalinuxuser/gearsystem/-/commit/db13c4fcd9e69bd1b7875bdda997823c37abdac8 [4] https://gitlab.com/alaskalinuxuser/gearsystem/-/commit/cb3c8eecbd3f2a03fac426cdb3c1111d3d44780a [5] https://gitlab.com/alaskalinuxuser/gearsystem/-/commit/9751dccbb5e2edcdd92ba7b893b1fa97d6cfeba3
Gearsystem Start Button Fix
A while back, I had the pleasure of updating the Gearsystem app from Xenial to Focal and then pushed it up to Noble for Ubuntu Touch phones. If you are unfamiliar, Gearsystem is a Sega Game Gear / Master System emulator, which allows you to play old games from those consoles on your phone.
When I did the original updates, and then moved it up through to Noble, I actually had not used the emulator that much. It was fun, but the older games used there were not my favorite titles. Don't get me wrong, I love old games, but I wasn't particularly interested in the old Master System titles. I guess I was just a Nintendo fanboy at heart. However, lately I started playing it more, due to some other life circumstances, and I realized that the emulator had a big problem!
When I started playing it originally, I tested all the buttons, but being unfamiliar with the console, I did not realize that there was a problem with the start button and "1" button. As it turns out, they were tied to the same function, so pressing either button had the same affect as pressing the "1" or "A" button.
Note: I don't know why for sure, but I think Sega called their buttons "1" and "2" instead of A and B so as not to infringe upon the Nintendo controls.
The reason I didn't realize there was a problem is because when testing a game, I would press the Start button at the title screen, which would start the game, then I would play the game with the 1 and 2 buttons. The game I used for testing was Street Fighter, which was from Brazil, which was technically a hack/backport where they took the Street Fighter II arcade game and redid it for the Master System. Since the 1 and 2 buttons were the kick and the punch, and pressing start started the game, I didn't realize that pressing the 1 button would also start the game, and pressing the start button would also punch.
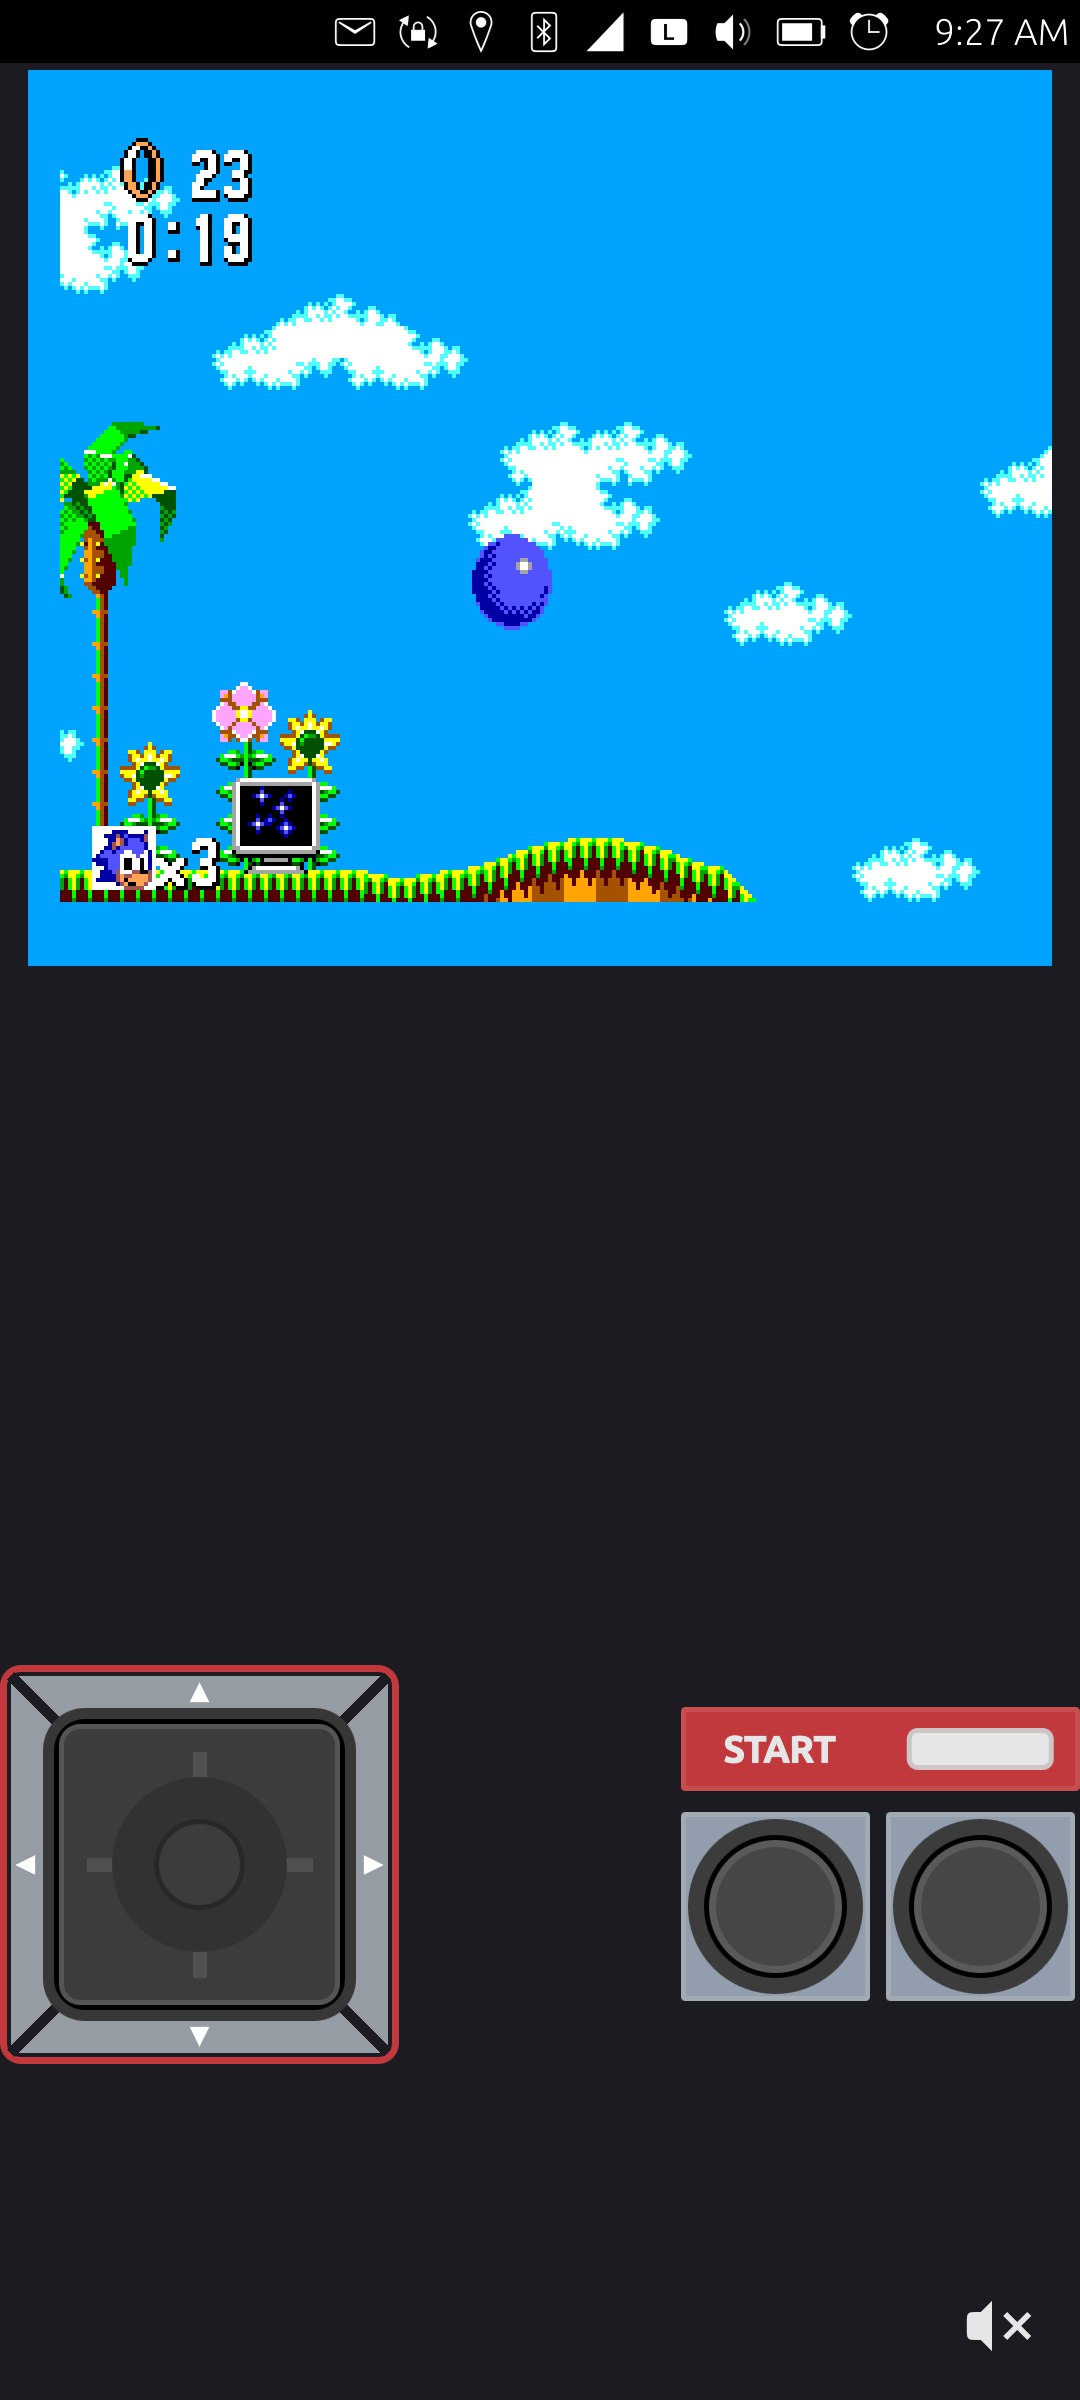
However, while playing several other titles lately, I quickly came to understand that the start button was not functioning as it should. Like in Sonic the Hedgehog, you can't pause the game. So, I started digging around. At first, I thought it might not be an emulator problem, but rather a QML problem with the QML displayed buttons not being mapped to the correct thing. I added some debugging logging statements and watched the console as I tested the emulator and found that all the buttons were mapped correctly, e.g., if you pushed the 1 button, it said "A button pressed" and if you pushed the start button it would say "Start button pressed", so that ruled out QML button mapping issues.
The next place I went to take a look was in the input.cpp and input.h files. Unfortunately, I spent way too much time there, only to realize in the end that it was not an input problem. However, that did lead me to a searchable term, which I was able to find with rgrep:
$ rgrep -i key_start
platforms/qt-shared/MainWindow.cpp: m_pEmulator->KeyPressed(joypad, Key_Start);
platforms/qt-shared/MainWindow.cpp: m_pEmulator->KeyReleased(joypad, Key_Start);
src/GSEmulator.cpp: keyPressed(Joypad_1, Key_Start);
src/GSEmulator.cpp: //keyPressed(Joypad_1, Key_Start);
src/GSEmulator.cpp: keyReleased(Joypad_1, Key_Start);
src/GSEmulator.cpp: //keyReleased(Joypad_1, Key_Start);
src/Input.cpp: if (!m_bGameGear && (key == Key_Start) && IsSetBit(m_Joypad1, Key_Start))
src/Input.cpp: m_IOPort00 = (IsSetBit(m_Joypad1, Key_Start) ? 0x80 : 0) & 0x80;
src/definitions.h: Key_Start = 6,
This listed all of the files with the phrase Key_Start in them, which you can see I originally got from the Input.cpp file. As it turned out, in the GSEmulator.cpp file, there was this odd block of code:
void GSEmulator::startPressed()
{
if (not m_emu->isGameGear()) {
aPressed();
} else {
keyPressed(Joypad_1, Key_Start);
}
}
So if the emulated ROM (game) is not a Game Gear game, then if you press the start button, it calls the function for pressing the "a" button. But if the ROM is a Game Gear game, then it calls the function for pressing the Start button. Odd. I was playing a bunch of Master System games, and the start button would not work for them, so I changed the code like this:
void GSEmulator::startPressed()
{
if (not m_emu->isGameGear()) {
//aPressed();
keyPressed(Joypad_1, Key_Start);
} else {
aPressed();
//keyPressed(Joypad_1, Key_Start);
}
}
I changed it this way because I thought it must be backwards. And this worked great for my test of Master System games. Unfortunately, it caused Game Gear games to not have a working start button! To be honest, I don't know why there is a difference between Game Gear and Master System in the code. The start button should just be the start button! So, I edited it again:
void GSEmulator::startPressed()
{
if (not m_emu->isGameGear()) {
//aPressed();
keyPressed(Joypad_1, Key_Start);
} else {
//aPressed();
keyPressed(Joypad_1, Key_Start);
}
}
I probably should remove the whole check if/else statement. But I left it in, in case there is some reason that I later will realize needs the check and to differentiate the two uses of the button. Either way, now it works for both Sega Game Gear games and for Sega Master System games.
Linux - keep it simple.
Ubuntu Touch works on AT&Ts whitelist
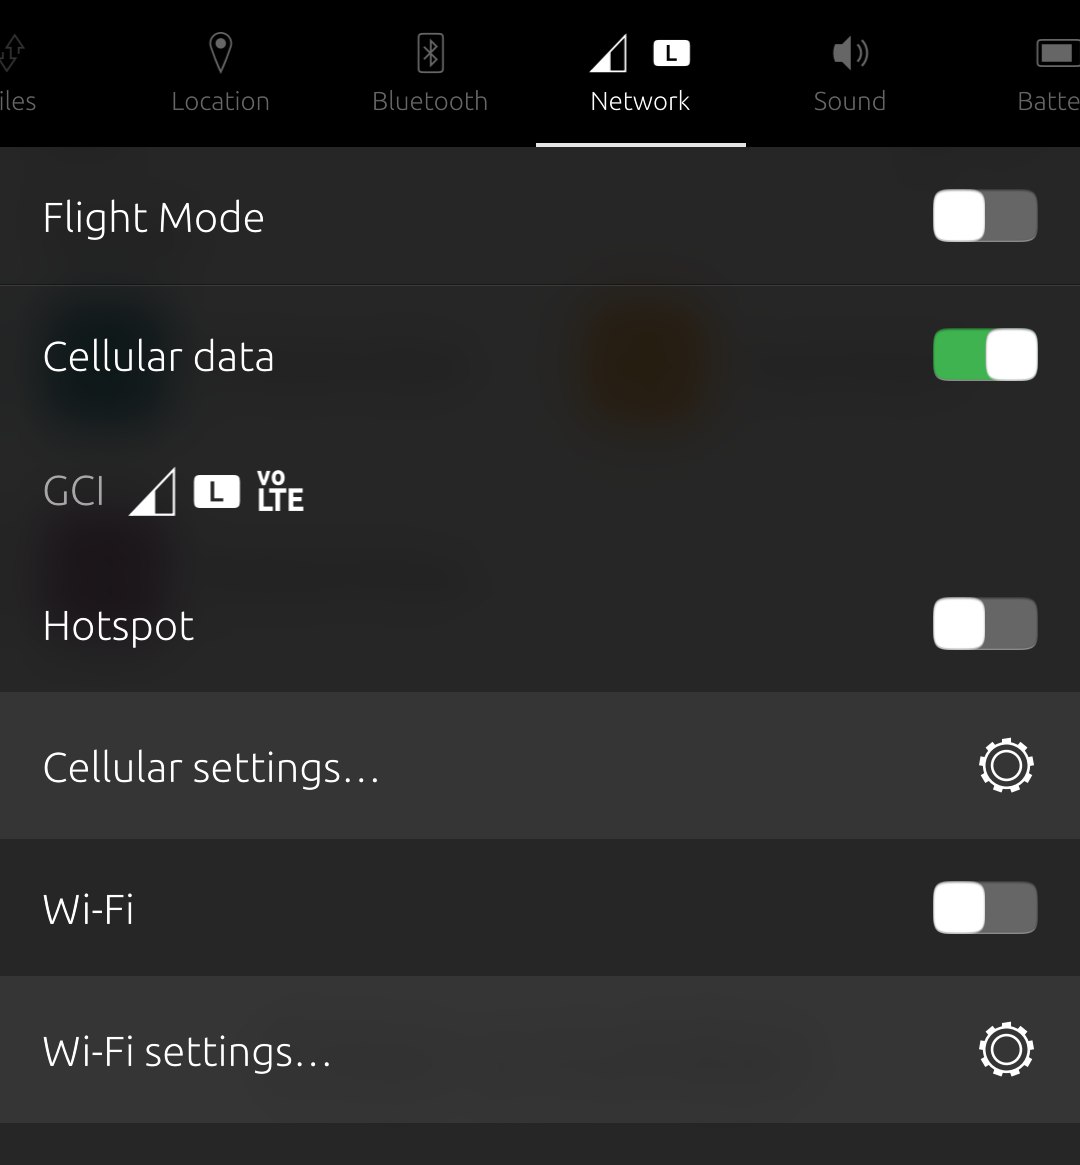
One of the biggest hangups for using Ubuntu Touch in the USA has finally been overcome! Through all the years that Ubuntu Touch has existed as an alternative to Android or iOS, it has always had one really big problem in the USA phone market: it coulnd't phone. Oh, for the first few years it could, back when I tried it out about 10 years ago, back when all cell phones made phone calls on 2G and 3G. Unfortunately for Ubuntu Touch, most of the USA cellular carriers switched to 4G and moved calling to VoLTE - Voice over LTE. This left Ubuntu Touch users without a way to make phone calls, because there was no working VoLTE implementation.
Fast forward a couple of years to last year, and some savvy Ubuntu Touch developers started implementing VoLTE on multiple devices. This was a huge boon to UT which allowed it to be used in many countries, inlcuding the USA with T-Mobile phones. Unfortunately, that still left any AT&T (or MVNO users - resellers like cricket, boost mobile, etc.) users out of luck. Because of AT&T's unfortunate "white list" policy, only pre-approved phones that were on their infamous white list could be used with their services. Oh sure, you could plug your AT&T sim card into any phone, but things like VoLTE wouldn't work, if the phone connected at all. This was a new low in service, in my opinion, but nobody asked me.... Fortunately, UT device developer Rueben [1] has, among all of his other excellent work, ported UT with VoLTE to a phone on the AT&T white list: the Oneplus Nord N10 5G! [2] Rueben also ported the N100, with working VoLTE, which is also on AT&T's whitelist, but the N10 has 5G, meaning the phone will probably last longer as the networks upgrade over time.
My carrier is a reseller, known as GCI. They actually have their own towers, but they are still the old 3G towers, which has been a blessing to me personally, since all of my old phones kept working even after the "3G shutdown" since GCI didn't have the funds nor a real reason to upgrade their towers to 4G. However, they have been slowly working on it, and they do have a deal with AT&T to use AT&T's network for 4G and above, or when you are traveling out of the state of Alaska. So when I heard the above, and some positive test results by other users, I decided to look around for one of these N10's. Fortunately for me, I found a guy who had one that I could pick up for a few bucks. I bought a phone case for it off of Amazon, and went to work switching it over to Ubuntu Touch.
Unfortunately, this was one of the worst phones to switch over, in my opinion, not just because of the tools or files needed, nor that you had to hand edit an XML file, but also because I needed to get an unlock code binary file from the phone manufacturer. However, the phone manufacturer was really friendly, and I will tell you the whole process I went through, if you want to try it out.
NOTE: Which variant of the phone you have does matter. If you have the Metro (2025), or T-Mobile (2028) variant, you can follow along with what I did directly. If you have the Unlocked (2026), or the Europe (2029) variant, you can skip getting a code from the manufacturer, since they have unlocked bootloaders from the factory. If I understand correctly, the AT&T variant cannot be unlocked. I had picked up the T-Mobile variant (2028), and this is what I did to switch it to Ubuntu Touch.
Prep:
Unboxed, opened phone, verified it is the 2028, which happened to be on Android 11. Cool.
Downloaded Global 10.5.7 firmware [3]. Then Download your original variant firmware. In my case, for the T-Mobile variant, I downloaded the T-Mobile firmware [4], but you can find the other variants online here [5].
Note that the instructions on the Ubports website [2] say you can download the Europe or Global version, but if you want all the USA bands to work, you need to download the Global version.
Unzip the firmware for both variants, which will create a new folder with all of the firmware in it.
Download oppo_decrypt [6].
Flash Global Firmware
A. Use oppo_decrypt, extracted both of the firmwares, the global variant and your actual variant.
On my linux machine, from within the oppo_decrypt folder I downloaded, I ran:
```
$ python3 ./opscrypto.py decrypt ~/Downloads/PATHTOFIRMWAREFOLDER/FILE.ops
```
This will make a new folder in the firmware directory that has the unpacked firmware.
With a text editor, like Kate, nano, vi, emacs, or whatever, find and edit the settings.xml file of the global variant. You want to change these six fields:
- Project
- ModelVerifyVersion
- ModelVerifyProjName
- RandomPadding
- ModelVerifyRandom
- ModelVerifyHashToken
You will fill in these six fields with the information from the settings.xml file from your actual variant's firmware. You can't just copy the entire settings.xml file over from the actual to the global because there are many different fields in there, only change the six fields mentioned here, save, and exit.
B. Repack the global firmware
On my linux machine, from within the oppo_decrypt folder I downloaded, I ran:
```
$ python3 ./opscrypto.py encrypt ~/Downloads/PATHTOFIRMWAREFOLDER
```
This will make a new firmware file, called output.ops
C. Flash global with the inlcuded MSM tool
In the firmware folder is the MSM tool, which is a Windows executable. At this point, I put the whole global firmware folder on a thumbstick and moved it to a Windows computer. After inserting the thumbstick, I just right clicked the program and ran it as an administrator. Using the MSM tool is complicated by itself, and an explanation would require lots of pictures. However, OnePlus has already written a guide just for that, which you can read here [9].
NOTE: You may need the Qualcomm drivers installed on the Windows machine [7].
Unlock the bootloader
Once the phone booted up, after flashing the stock global Android 10 firmware, I could see the T-Mobile logo was gone, and under settings, the phone was listed as being Android 10. That's great! All of the below are per the instructions from the OnePlus website [8] with some added clarification by me.
Skip everything in the setup, and turn on developer options with the usual multiple taps on the build number. Make sure you don't connect to the internet yet, via cellular or WiFi! If it manages to connect at this stage, it will try to download the latest firmware version and will update to a newer Android version, which you do not want to do. This happened to me the first time, and I had to reflash the global firmware again, so keep that in mind.
Under developer settings, turn on ADB debugging, turn off automatic updates.
If yours is like mine, it will not allow you to turn on OEM unlock or bootloader unlock yet. Now that you have disabled automatic updates, you can turn on the WiFi or cellular data, and after a minute or two, the OEM unlock/bootloader unlock button will be active, allowing you to then toggle it to OEM unlock.
Get the unlock code.
Use ADB to reboot into fastboot with $ adb reboot fastboot and wait for the phone to reboot. For me, it showed a strange screen with multiple language choices, and I chose English, then it went to fastboot.
At this point you can try to unlock it with $ fastboot oem unlock, but for me it failed saying: FAILED (remote: 'Please flash unlock token first.')
Now run the command to get the unlock code: $ fastboot oem get_unlock_code Copy all of the output to a text file. You'll need it later.
Reboot the phone and get your PCBA by opening the dialer app and dialing *#888#. Write this down, copy it for later.
Head over to the OnePlus website to get your unlock token [10] wich is a binary file you will need to flash. On the form, fill in all of the requested information. If you are lucky, it will accept your submission and you will get the unlock token. Unfortunately for me, it failed, saying that the serial number was incorrect. I believe that this will happen to you too, because it recognizes the firmware as one variant, and the serial number as a different variant. But, it only takes a few seconds to try this, so give it a go.
If, like me, the form failed, then you have to send an email to support@oneplus.com. In this email, I simply said that I purchased a phone and would like the unlock token. I let them know that the website gave me an error. In the email I included:
get_unlock_code info
PCBA info
Serial number
and proof of purchase, e.g., a reciept from buying it off of Amazon or locally, or whatever.
I don't know if you need the proof of purchase, but some people said if you don't inlcude it, they will ask you about it. I just sent mine with the first email. If you bought it from a friend, you can just do a quick bill of sale and send that. All in all, they sent me three emails saying they were routing my request to the right people, still working on it, escalating the case, and then sent me an email with the unlock token file. This took 8 days in all, if I recall correctly.
IV. Flash the unlock code.
Now that you have the unlock code, reboot the phone back into fastboot, and type `$ fastboot flash cust-unlock <unlock_token.bin>` It will say it is writing the customer unlock file, then say okay.
Now you can actually unlock the bootloader with the usual `$ fastboot oem unlock` command. At the prompt, choose to unlock the bootloader, and you are now ready to install Ubuntu Touch!
Flash Ubuntu Touch
That was a lot of work, but we are in the final stretch now. What you need at this point is the UBports installer. Most Linux distros come with one, and you can just apt-get install ubports-installer or similar. You can also just download it from the UBports website [11] for any OS, like Mac or Windows or Linux.
The plus side is this part is simple. Launch the UBports installer, plug in your phone, and follow the on screen instructions.
NOTE 1: If it doesn't recognize what type of phone it is, just choose the OnePlus Nord N10 5G, also known as "billie".
NOTE 2: If the first part says waiting for phone or waiting for fastboot, or rebooting to fastboot, and it doesn't, reboot the phone into fastboot and the installer will pick up from there. I tried two different versions of the installer, and one had that problem. I can't remmeber wich version had that issue.
NOTE 3: At the time of this writing, if you want the VoLTE to work, choose 24.04.1x/daily for the install. Hopefully it will be moved to 24.04.1x/stable soon, and most likely if you are reading this months or years later, the newer versions will have it in there as well.
Enjoy Ubuntu Touch!
As you can see, that was not for the faint of heart. But, if you stuck with it, you deserve to treat yourself to some ice cream or whatever your favorite munchy is, because that was tough and long in the tooth. Now you can sit back and set up your new to you UT phone and enjoy some VoLTE calling from something that is not Android or iOS!
Linux - keep it simple.
[1] https://gitlab.com/rubencarneiro [2] https://devices.ubuntu-touch.io/device/billie/release/noble/ [3] Global_OxygenOS_10.5.7.zip [4] T-Mobile_OxygenOS_10.5.8.zip [5] All variants firmware [6] oppo_decrypt [7] Qcomm drivers [8] OPO unlock bootloader instructions [9] How to use the MSM tool [10] Unlock token [11] UBports installer